This post may contain affiliate links. Please read my disclosure policy.

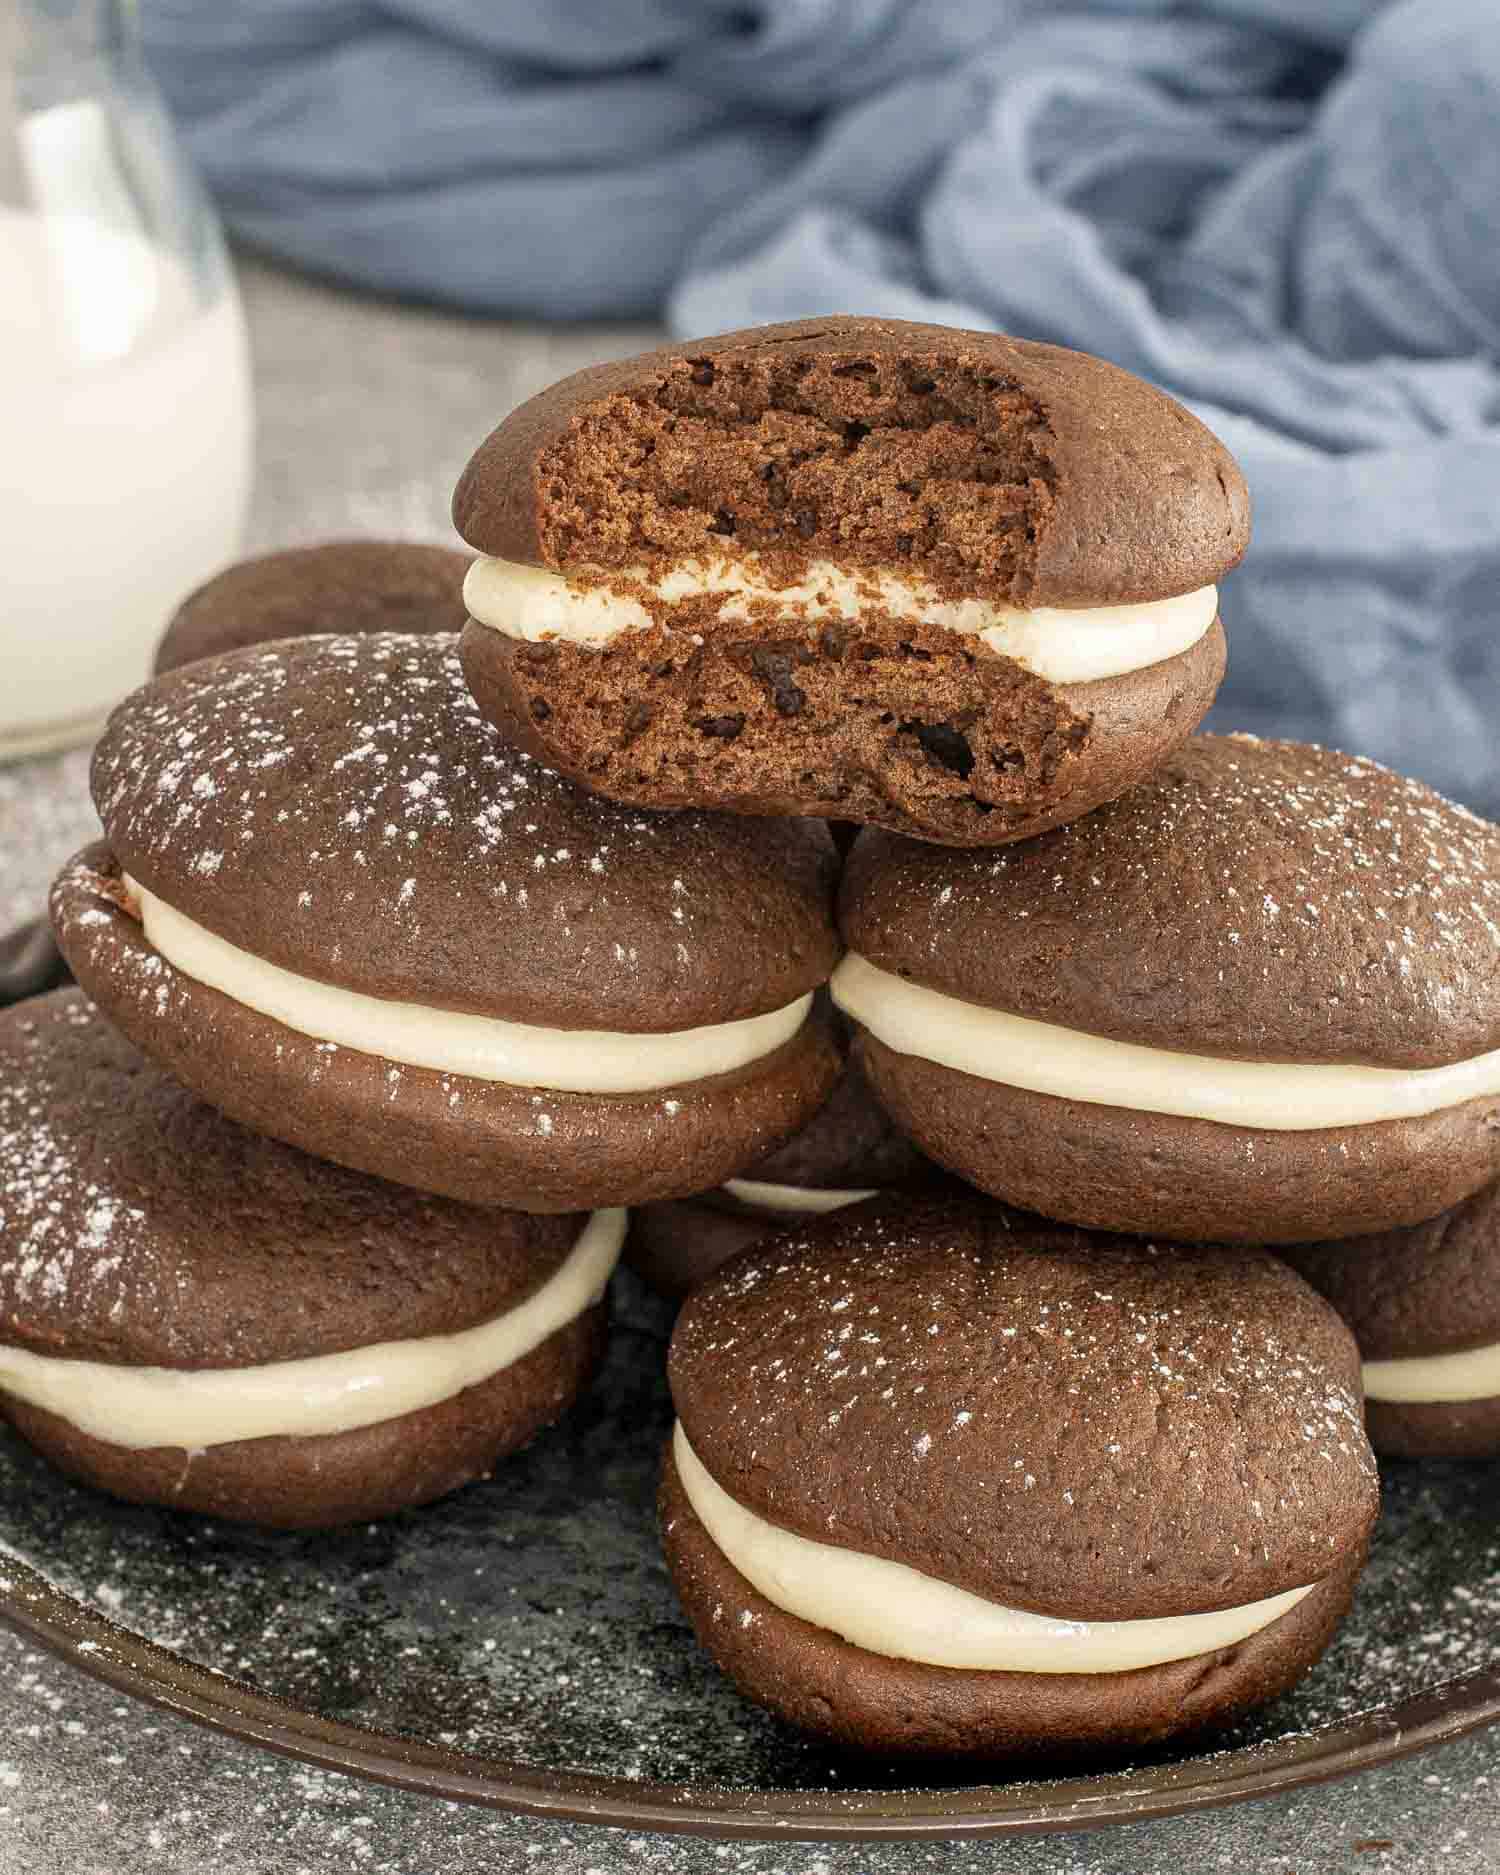
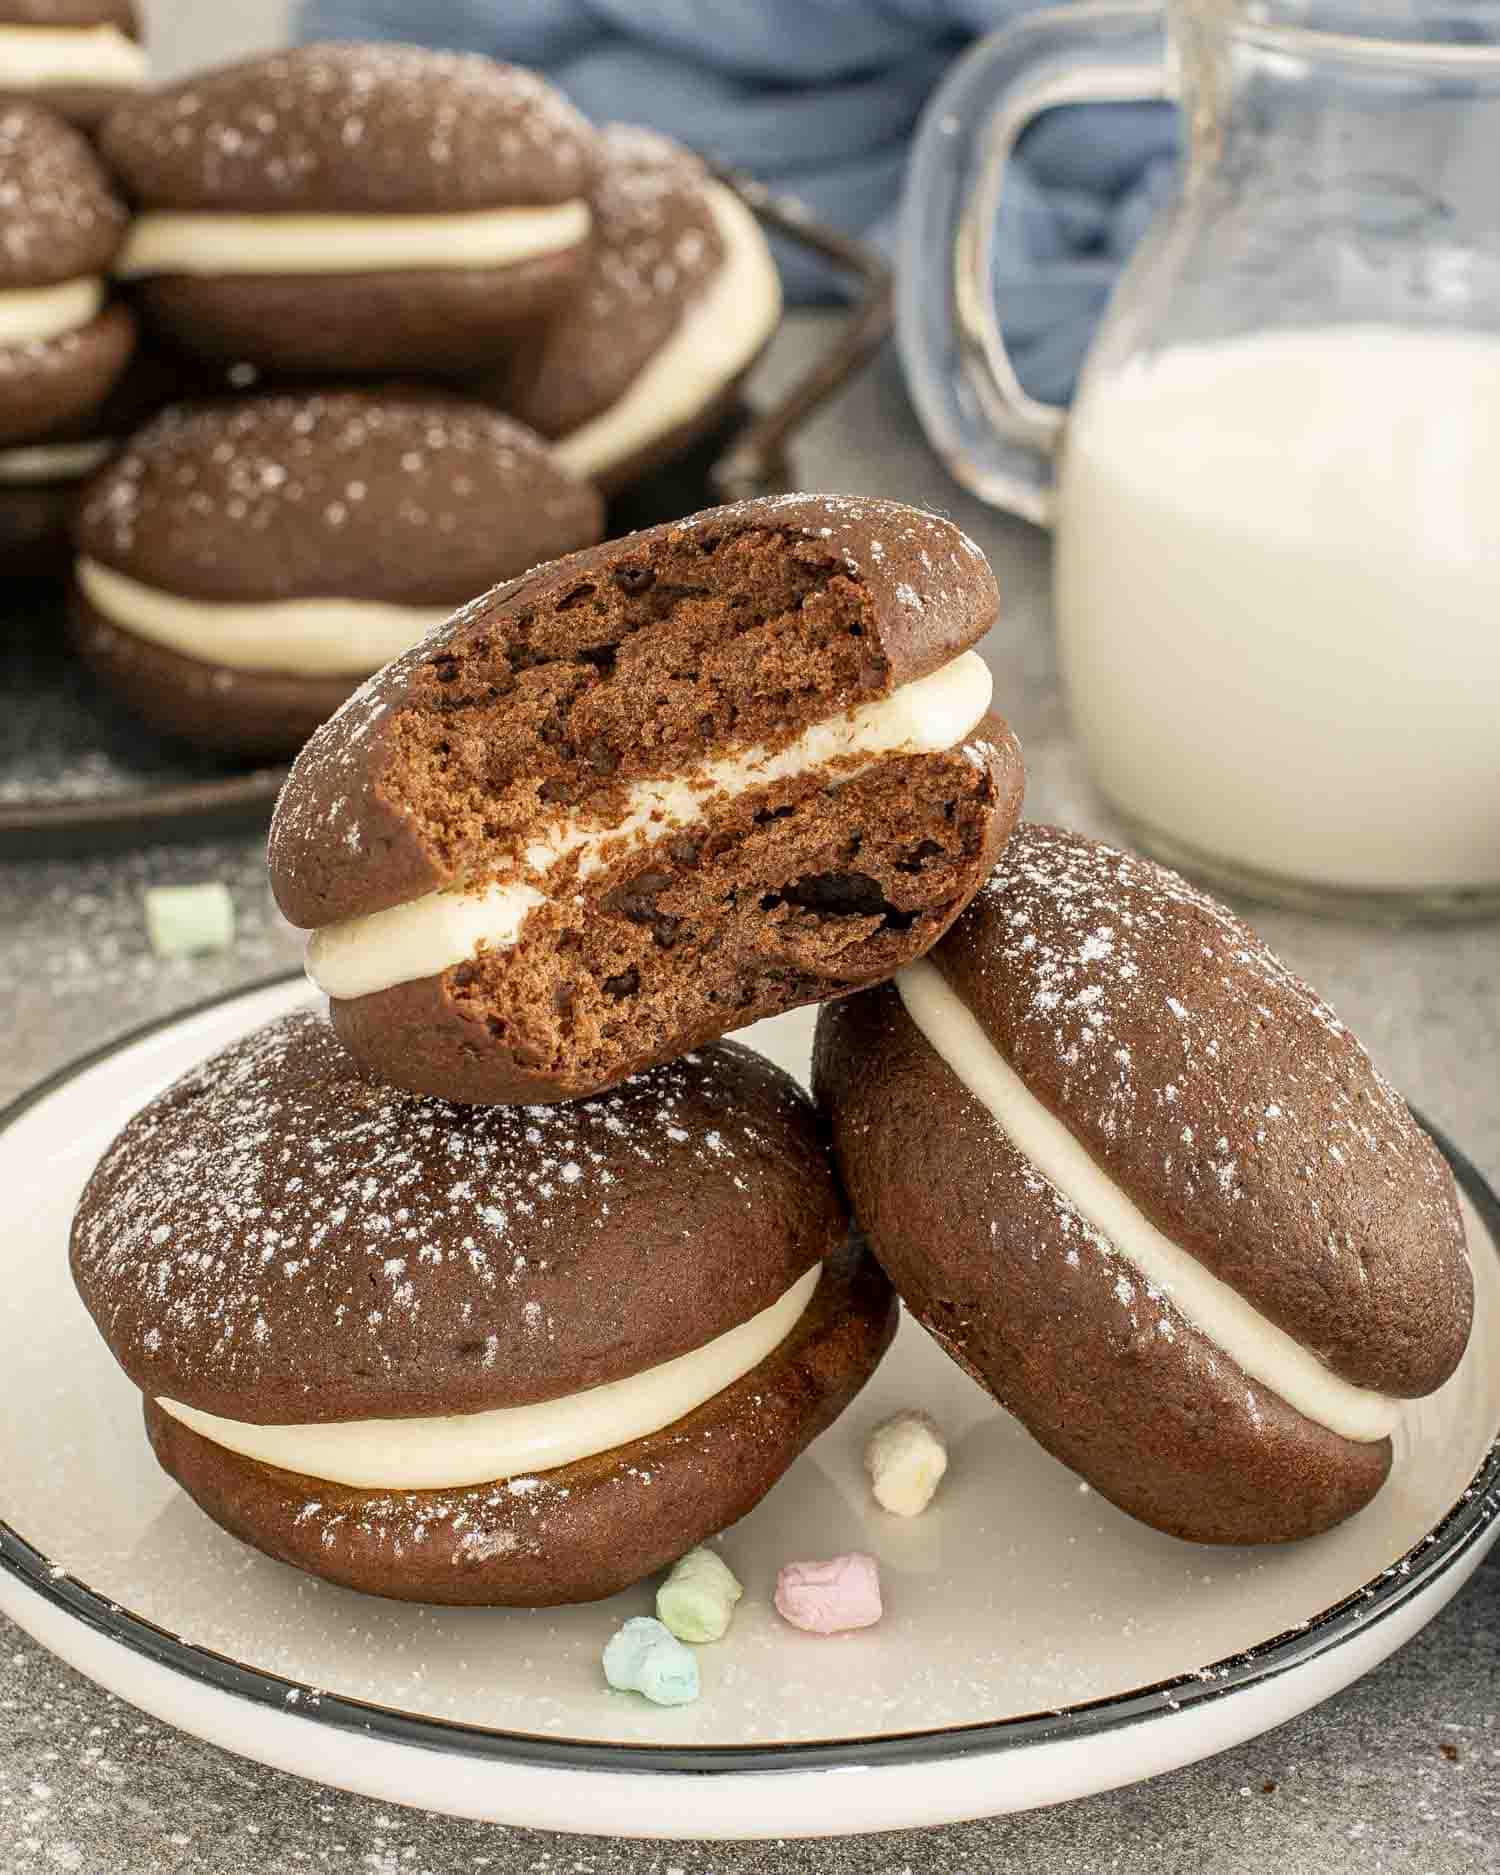
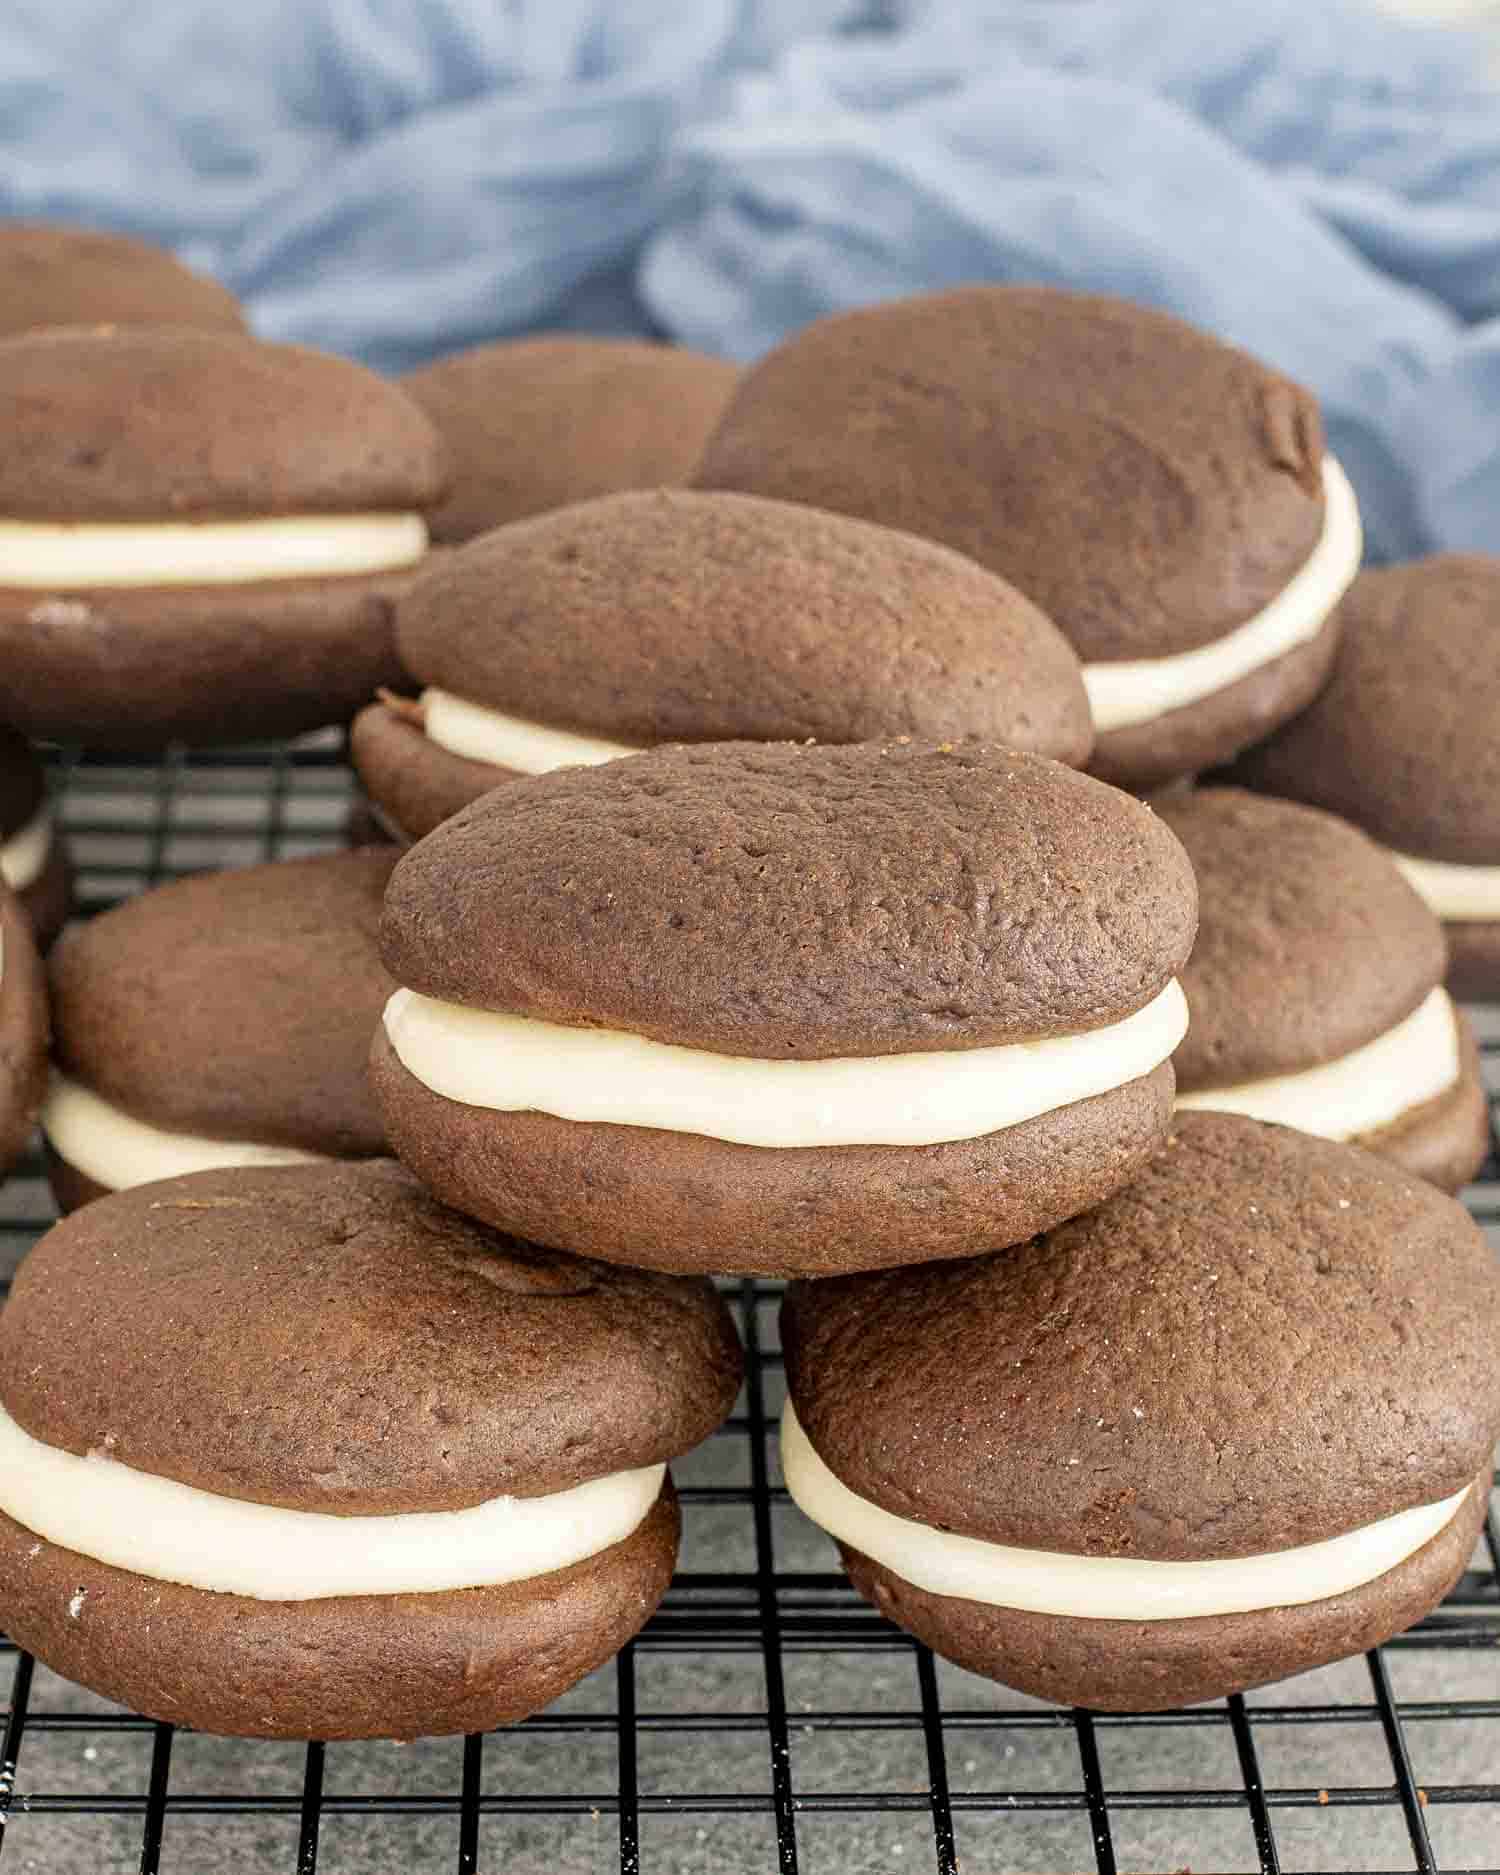
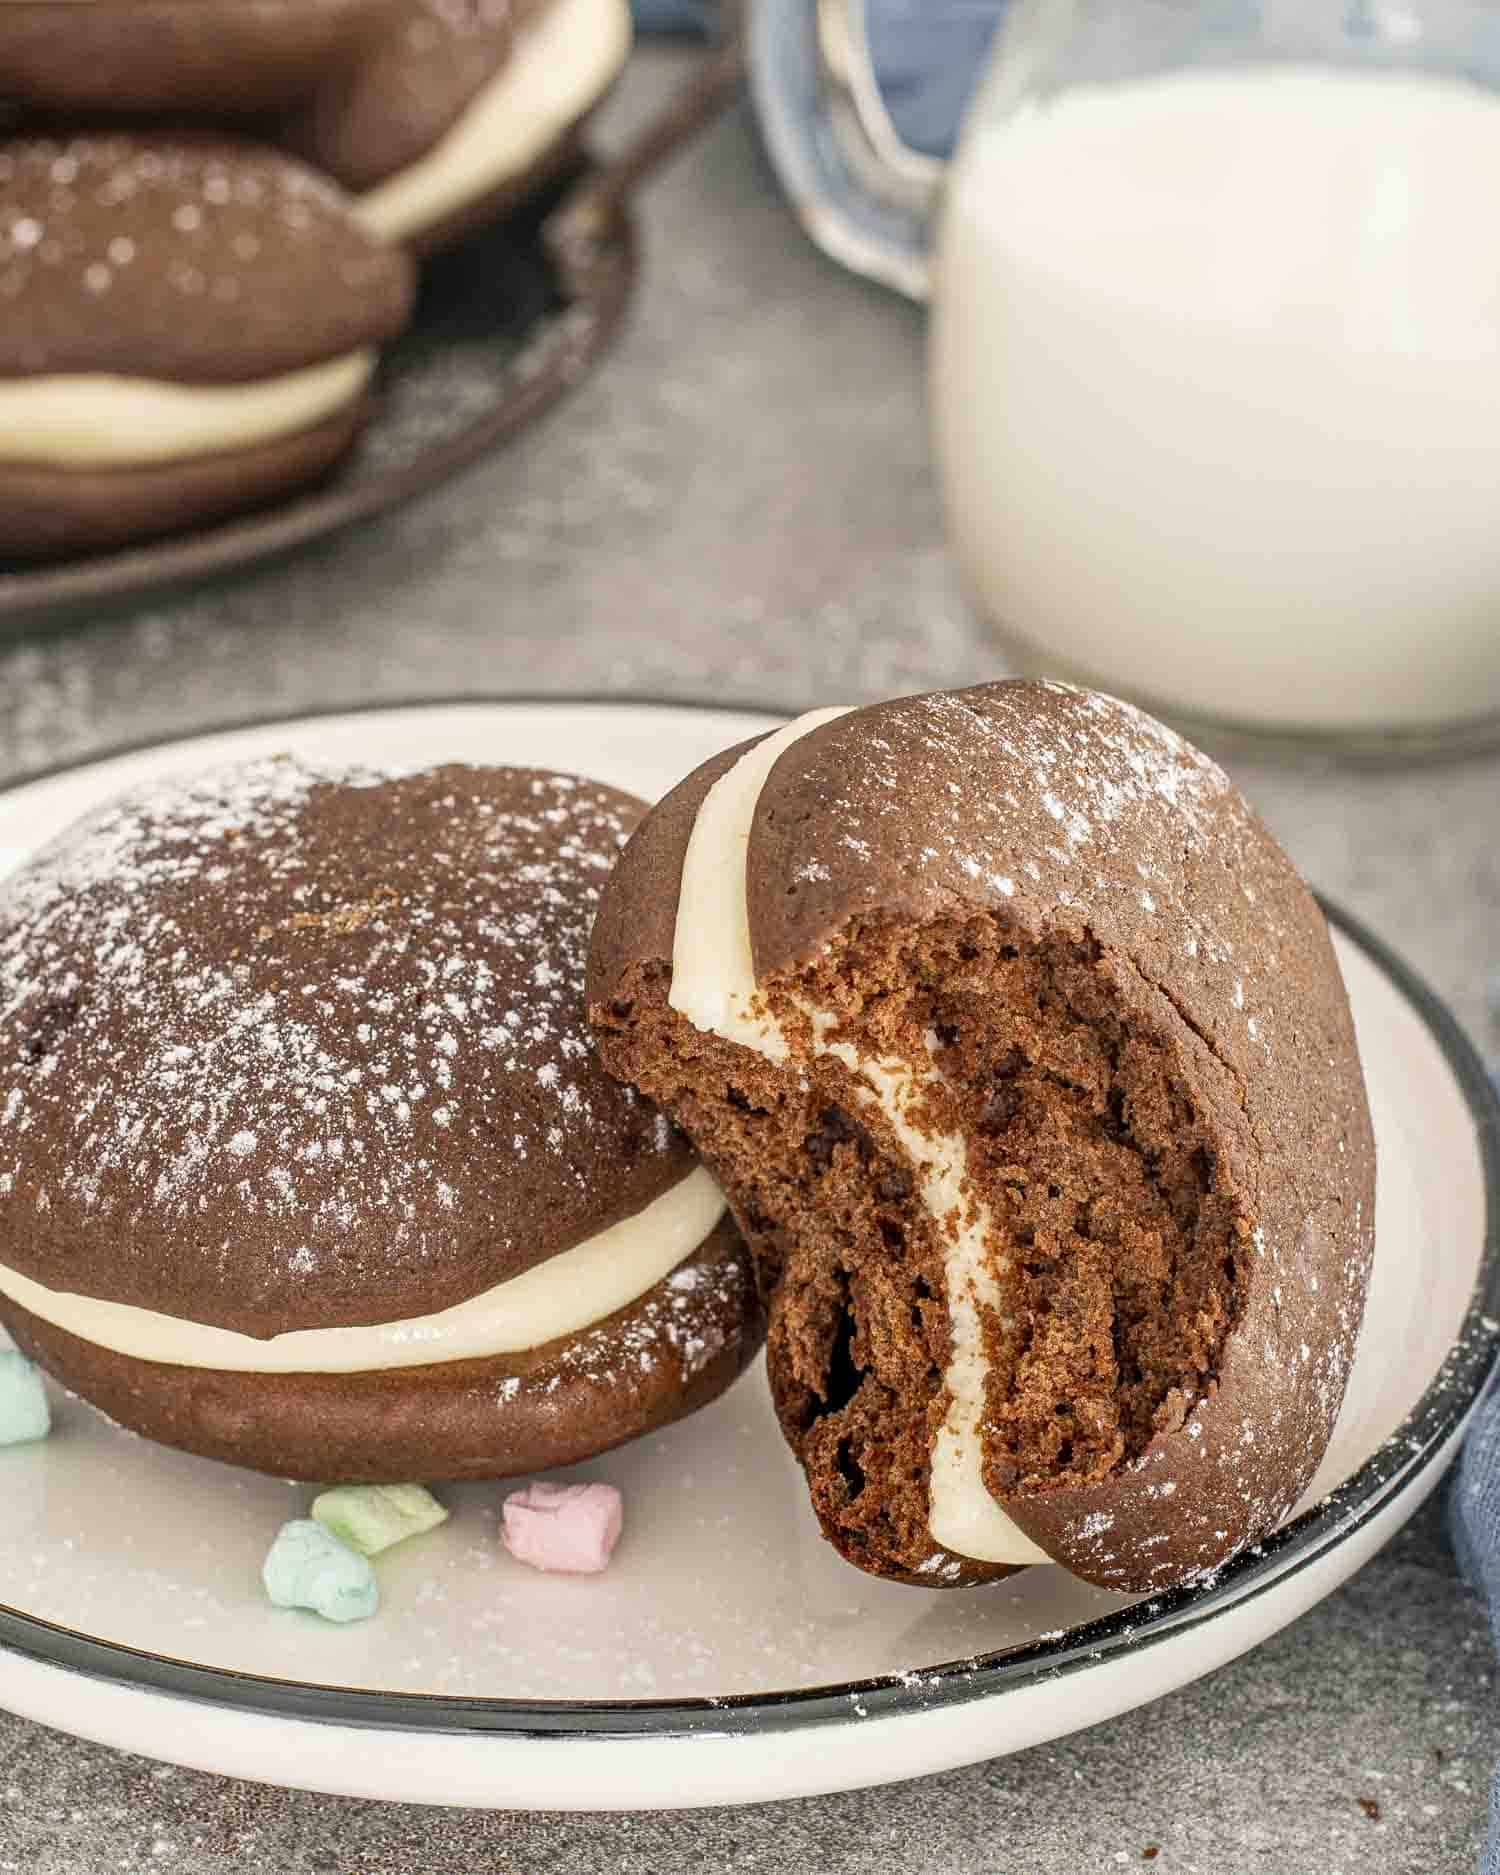
These Whoopie Pies feature soft, chocolatey cakes hugging a fluffy marshmallow filling—it’s like the best part of a childhood lunchbox, made even better. They’re fun to make and even more fun to eat—bet you can’t have just one!
Why I Love These Whoopie Pies
There’s something truly special about baking treats that bring out everyone’s inner child, and these Whoopie Pies do just that! Picture soft, chocolatey cakes that are so tender they practically melt in your mouth, hugging a fluffy marshmallow filling that’s just the right amount of sweet. It’s like creating little bites of joy right in your kitchen. Trust me, once you make these, you’ll find any excuse to whip them up again.
Before You Start
- Bring Ingredients to Room Temperature: Let your butter and egg sit out for a bit until they’re at room temperature. This makes them mix more smoothly into the batter, giving you a better texture in your cakes.
- Measure Flour Correctly: Use the spoon-and-level method for measuring flour. Spoon the flour into your measuring cup, then level it off with the back of a knife. This helps prevent dense, heavy cakes caused by too much flour.
- Don’t Overmix the Batter: When combining your wet and dry ingredients, mix just until everything is incorporated. Overmixing can make your cakes tough instead of tender.
- Consistent Cake Sizes: Use a cookie scoop or a tablespoon to drop the batter onto the baking sheets. This keeps your cakes uniform in size, so they pair up nicely when you assemble the Whoopie Pies.
- Mind the Baking Time: Keep an eye on the cakes—they bake quickly! They’re ready when they spring back lightly to the touch. Overbaking can dry them out.
- Cool Completely Before Filling: Make sure the cakes are fully cooled on a wire rack before adding the marshmallow filling. If they’re even a bit warm, the filling can melt and slide right off.
- Melting Marshmallows: When melting the marshmallows in the microwave, do it in short 15-second bursts, stirring in between. This prevents them from overheating and becoming tough.
- Adjust Filling Consistency: If your marshmallow filling feels too thick, add a tablespoon or two of heavy cream to reach a spreadable consistency. If it’s too thin, mix in a bit more powdered sugar.
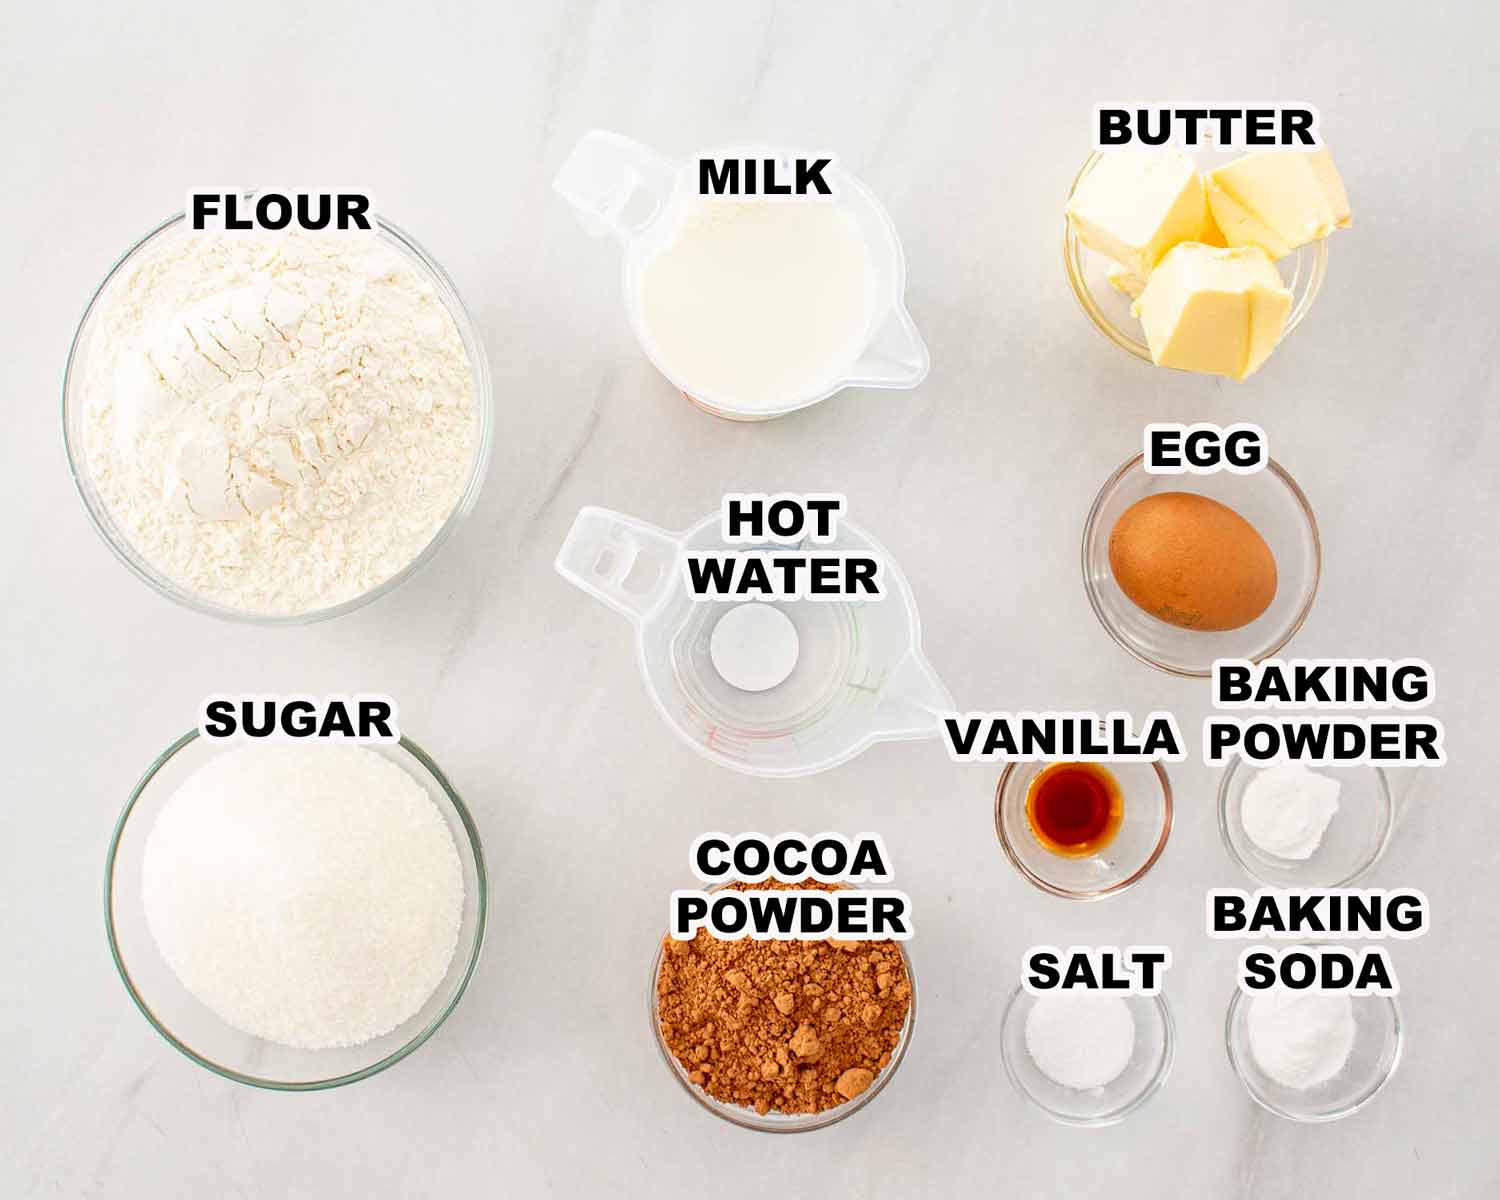
Ingredients You’ll Need
- All-Purpose Flour: If you prefer, swap in a gluten-free flour blend.
- Unsweetened Cocoa Powder: For that rich chocolate flavor in our cakes.
- Baking Soda and Baking Powder: Help the cakes rise, making them fluffy and light.
- Salt: Enhances the overall flavors and balances the sweetness.
- Granulated Sugar: Sweetens the cakes to perfection.
- Unsalted Butter: Adds moisture and richness. Soften it beforehand for easier mixing.
- Large Egg: Binds everything together and adds moisture.
- Vanilla Extract: Infuses both the cakes and filling with warm, aromatic flavor.
- Whole Milk: Keeps the batter moist and results in a tender crumb. You can use a dairy-free milk alternative if you like.
- Hot Water: Blooms the cocoa powder, intensifying the chocolate taste.
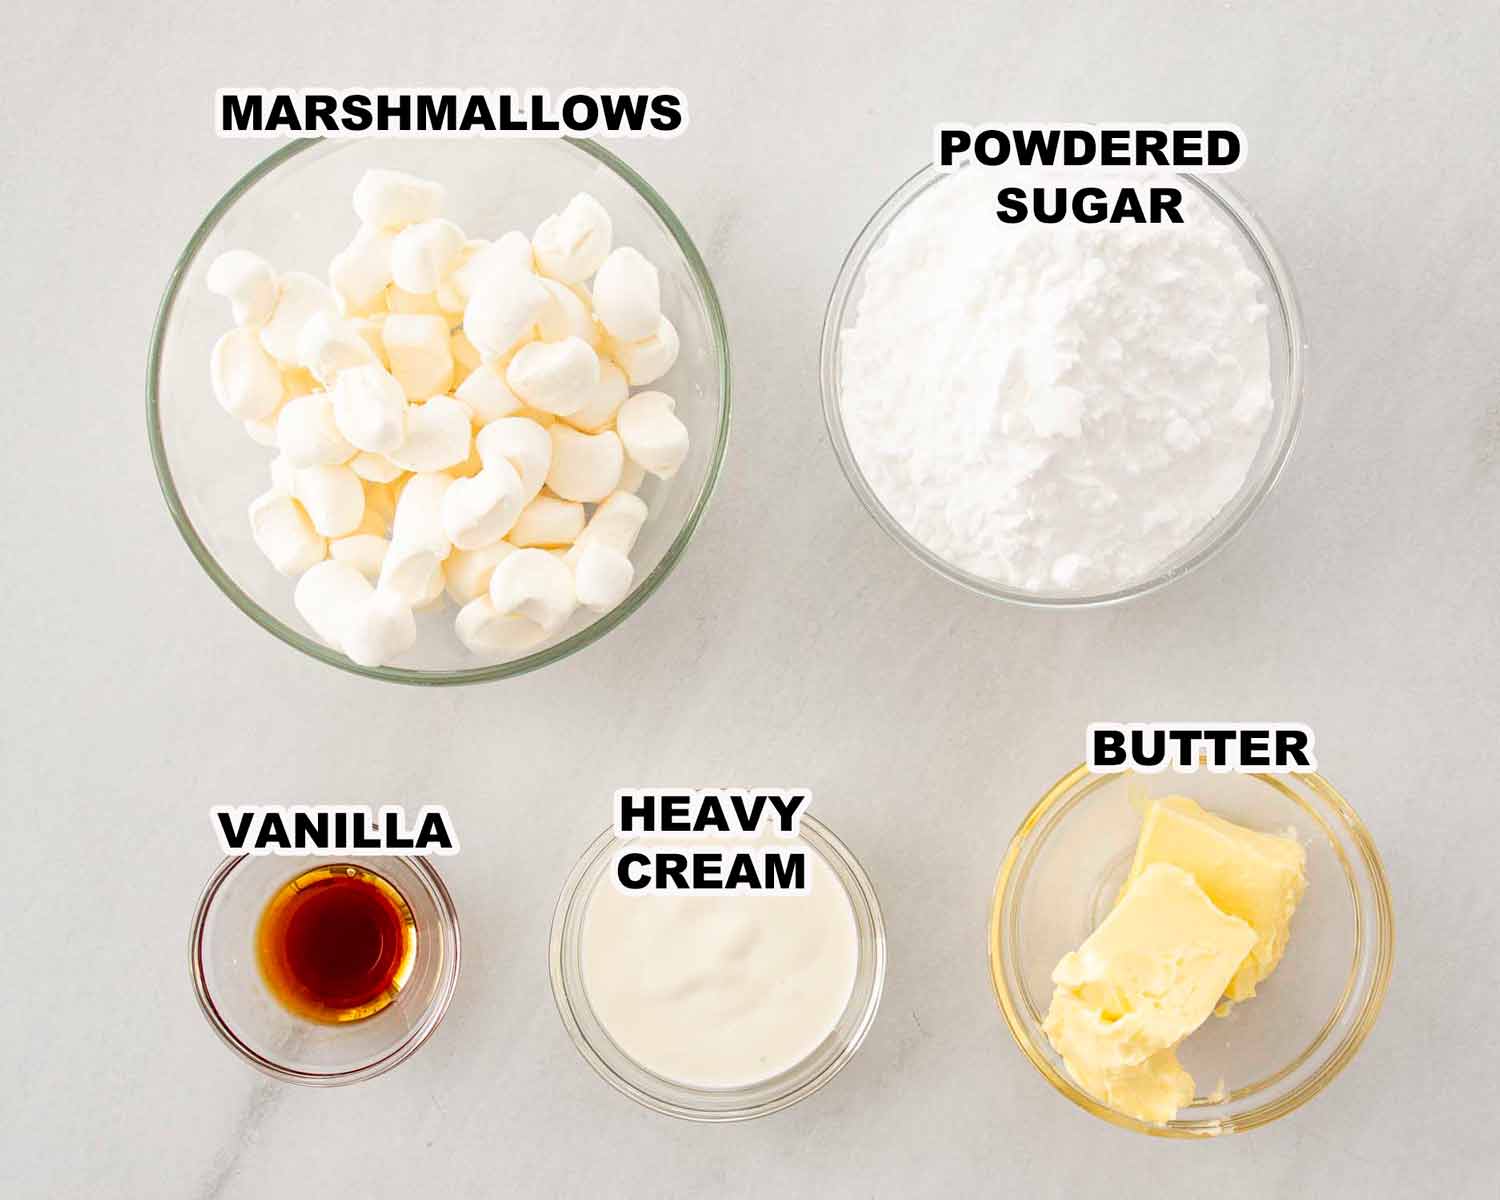
- Mini Marshmallows: Create that fluffy, sweet center. If you have large marshmallows, just chop them up.
- Unsalted Butter: Adds creaminess to the filling. Make sure it’s softened for easy mixing.
- Powdered Sugar: Sweetens and thickens the filling to the right consistency.
- Vanilla Extract: Adds extra flavor to the filling.
- Heavy Cream: Optional, but helps adjust the filling to a spreadable consistency if needed.
First things first, preheat your oven to 350°F (175°C). Line two large baking sheets with parchment paper.
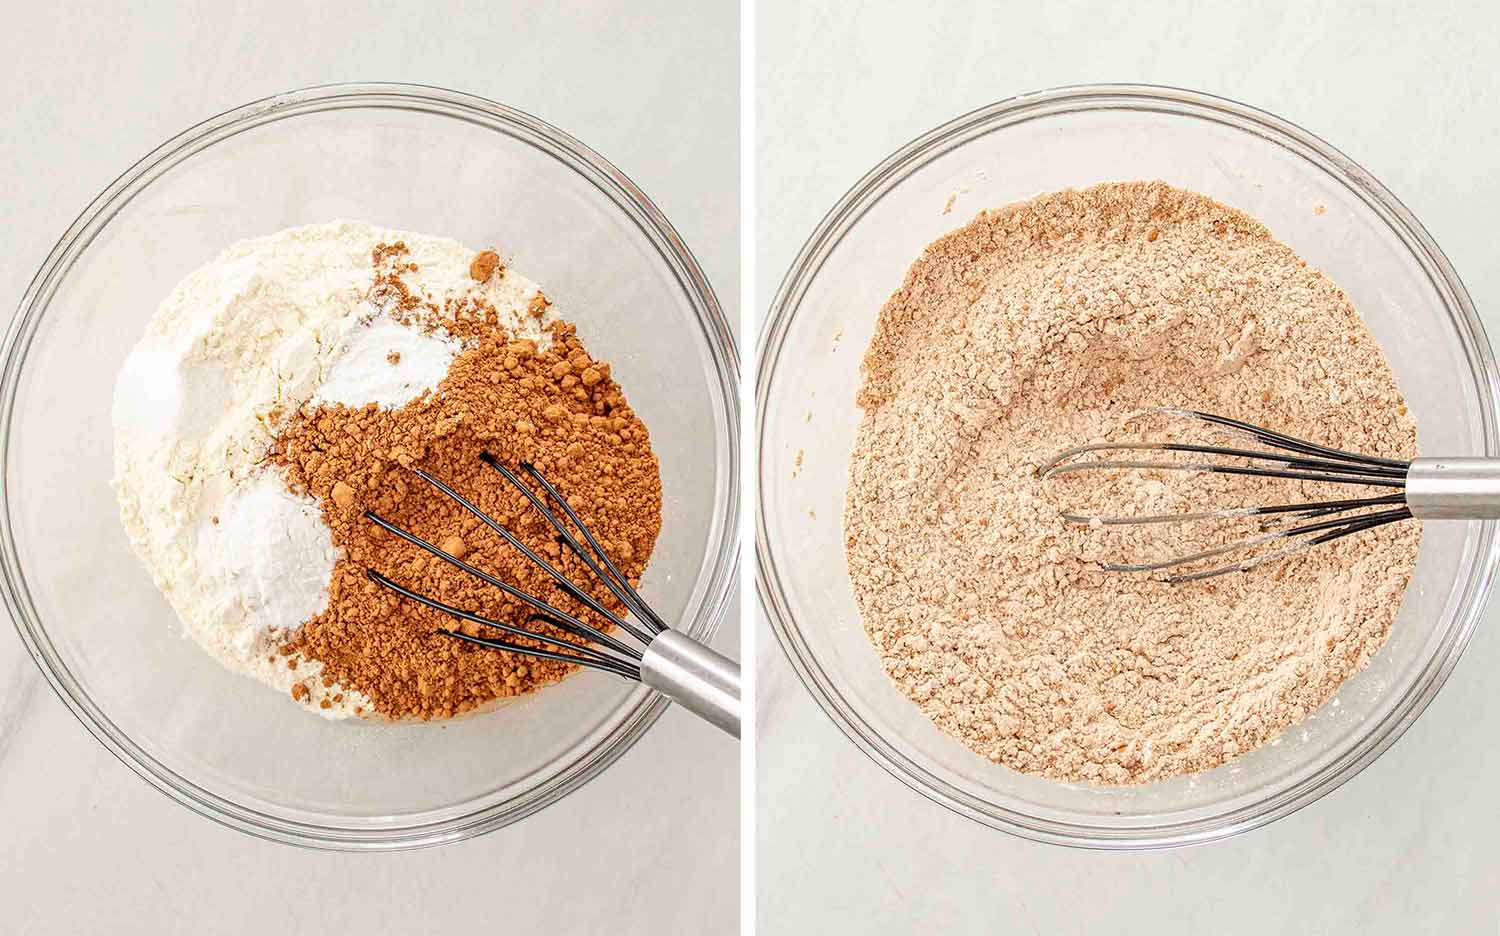
In a medium bowl, whisk together 2 cups of all-purpose flour, ½ cup of unsweetened cocoa powder, 1¼ teaspoons of baking soda, ½ teaspoon of baking powder, and ½ teaspoon of salt.
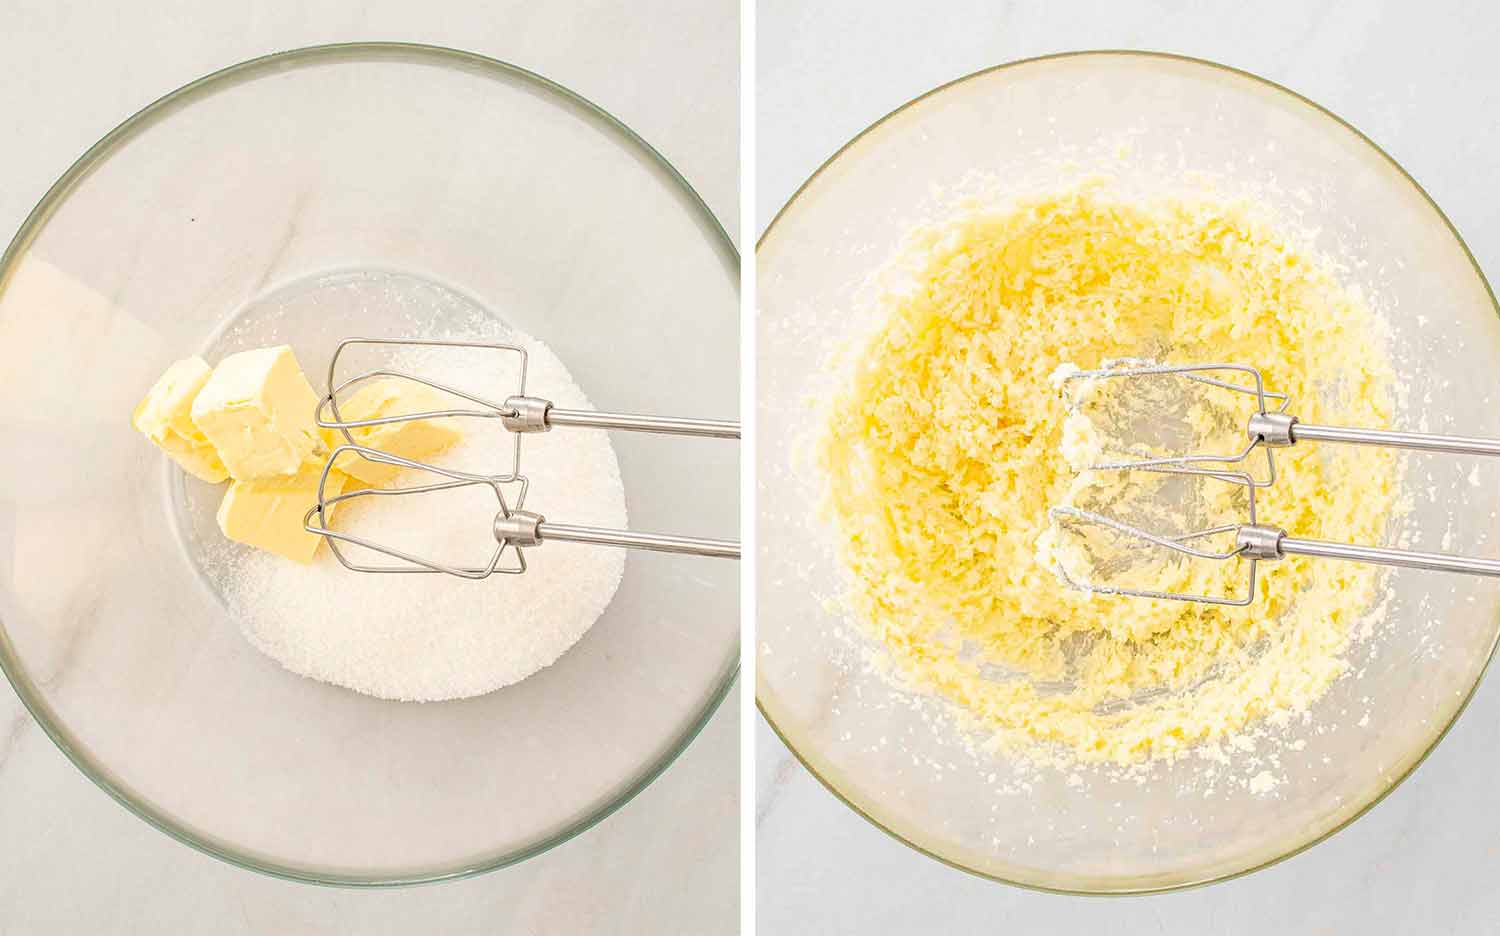
In a large mixing bowl, beat ½ cup of softened unsalted butter with 1 cup of granulated sugar until light and fluffy, about 2 minutes.
Tip: Creaming incorporates air into the mixture, resulting in lighter, fluffier cakes.
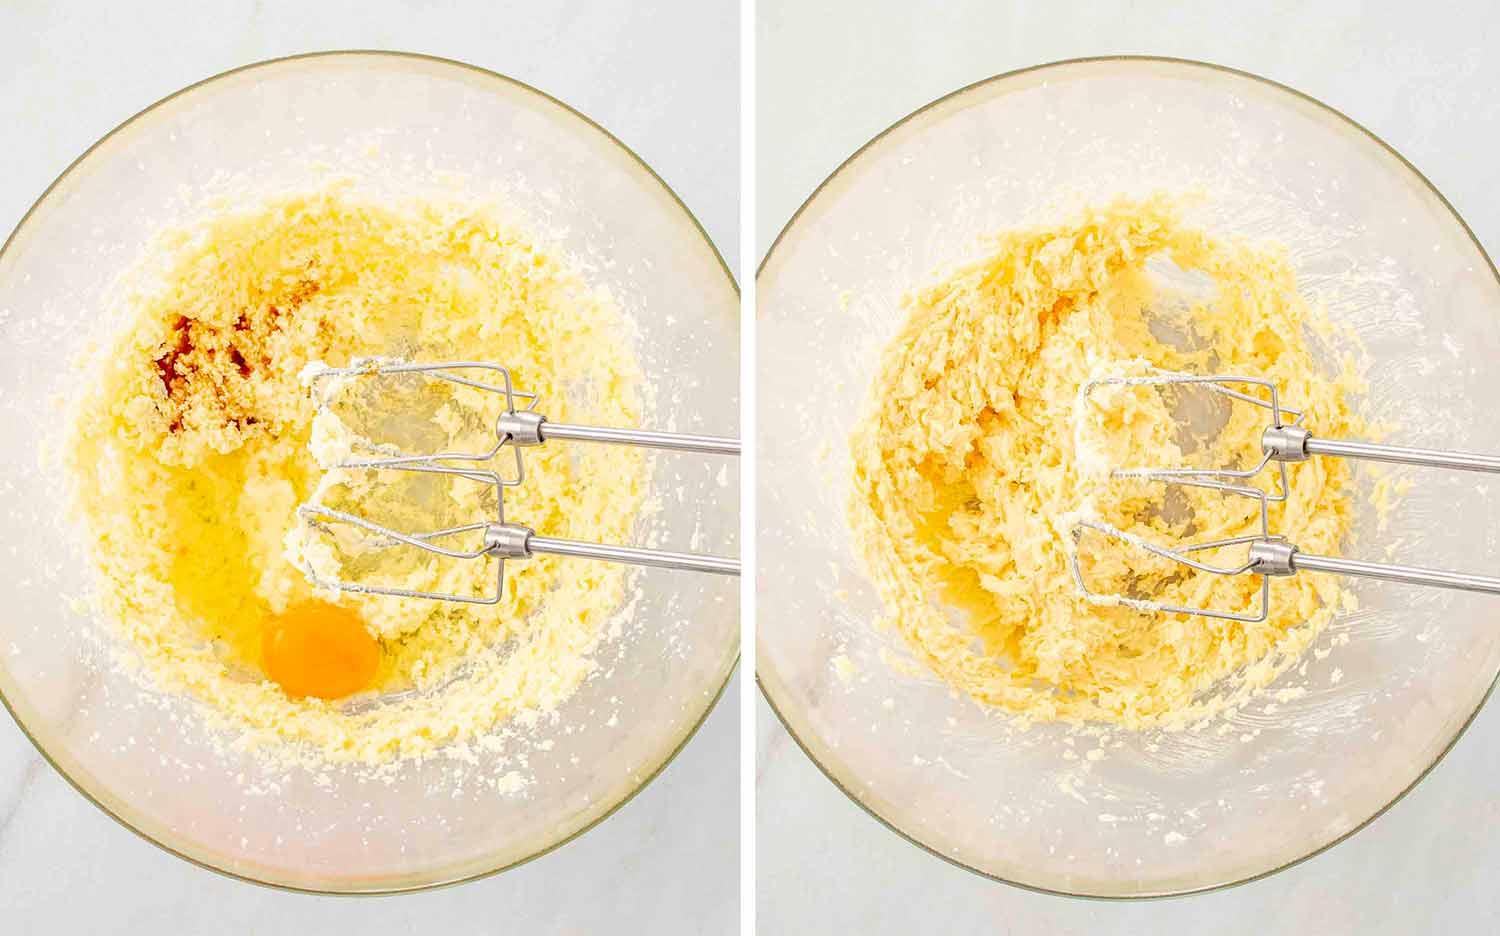
Add 1 large egg and 1 teaspoon of vanilla extract to the butter-sugar mixture. Beat until well combined.
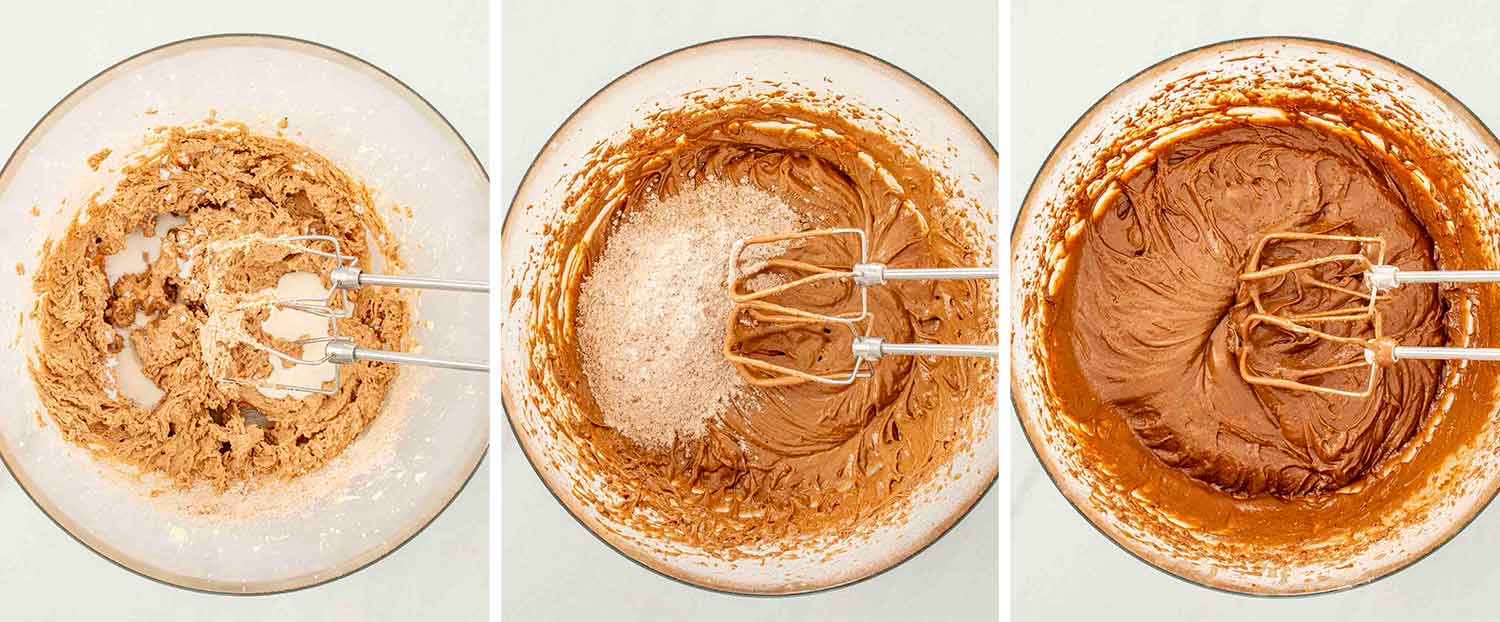
Gradually add the dry ingredients to the butter mixture, alternating with 1 cup of whole milk. Begin and end with the dry ingredients, mixing just until combined after each addition. Stir in ½ cup of hot water until the batter is smooth and slightly runny.
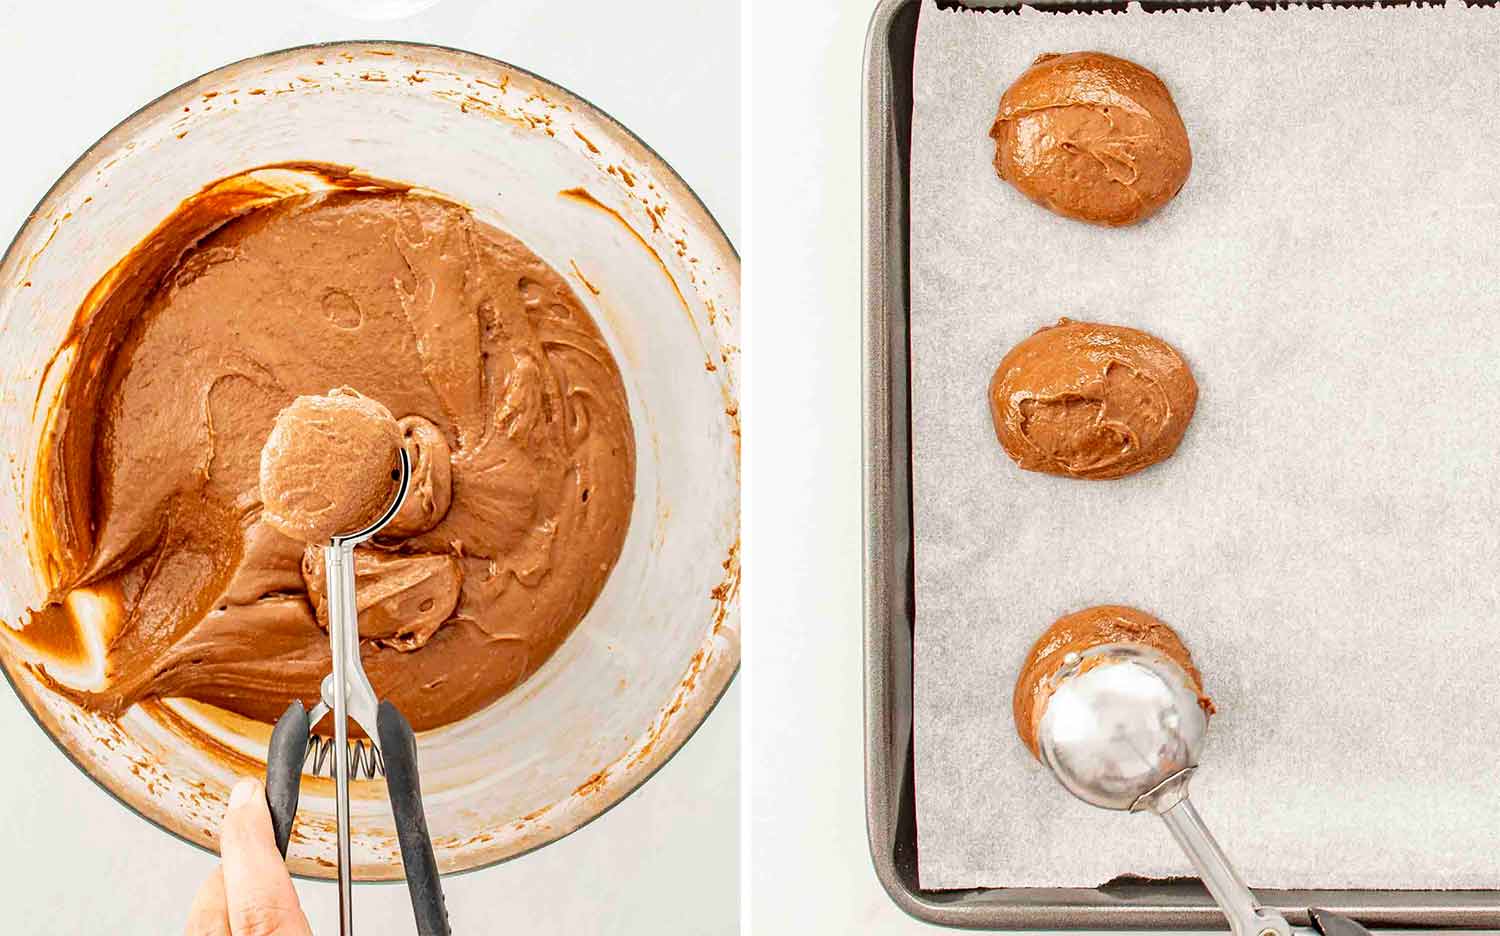
Drop heaping tablespoons of batter onto the prepared baking sheets, spacing them about 2 inches apart. You should have about 24-28 individual cakes.
Tip: Spacing allows the cakes to spread without touching, ensuring they bake evenly.
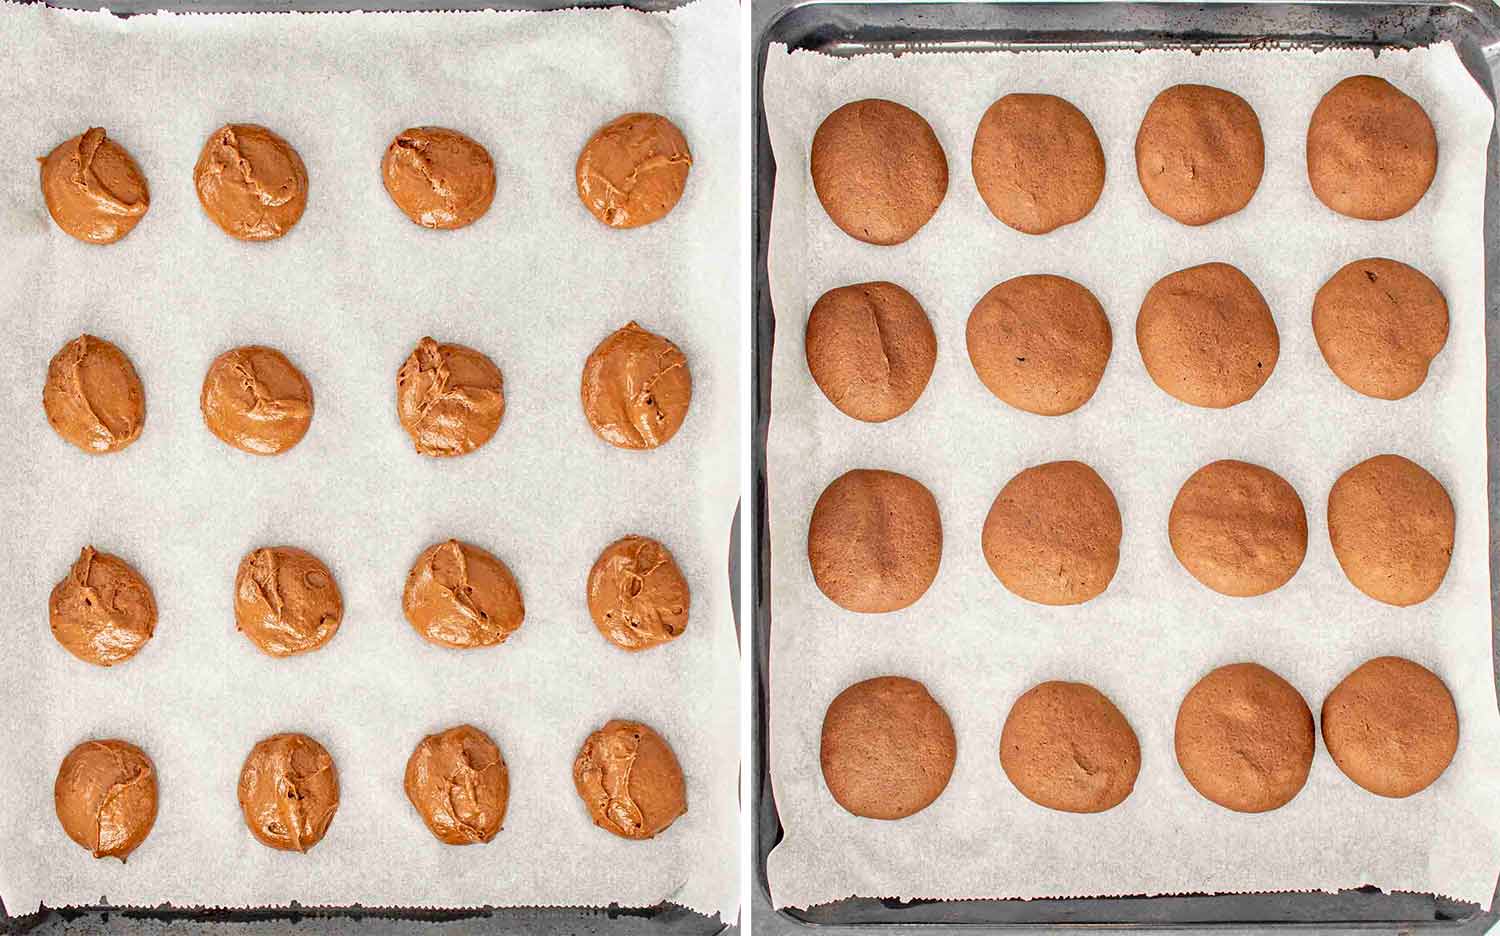
Bake for 10-12 minutes, or until the cakes spring back when lightly touched. Let the cakes cool on the baking sheets for 5 minutes, then transfer them to wire racks to cool completely.
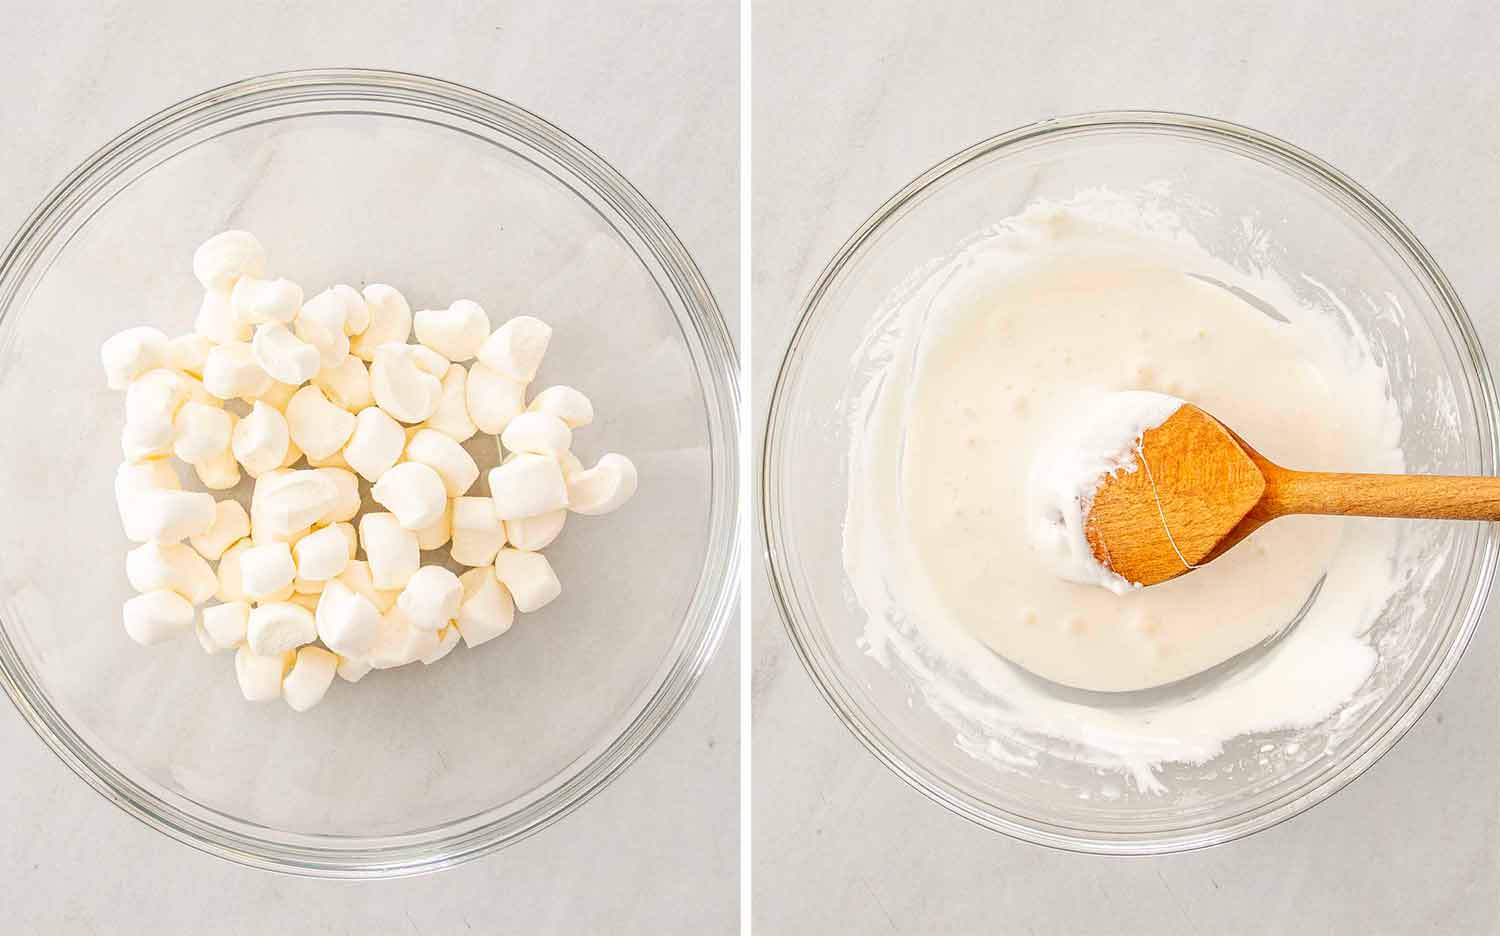
In a heatproof bowl, combine 1 cup of mini marshmallows (or chopped large marshmallows) with 1 tablespoon of water. Microwave in 15-second intervals, stirring between each, until fully melted and smooth. Let it cool slightly.
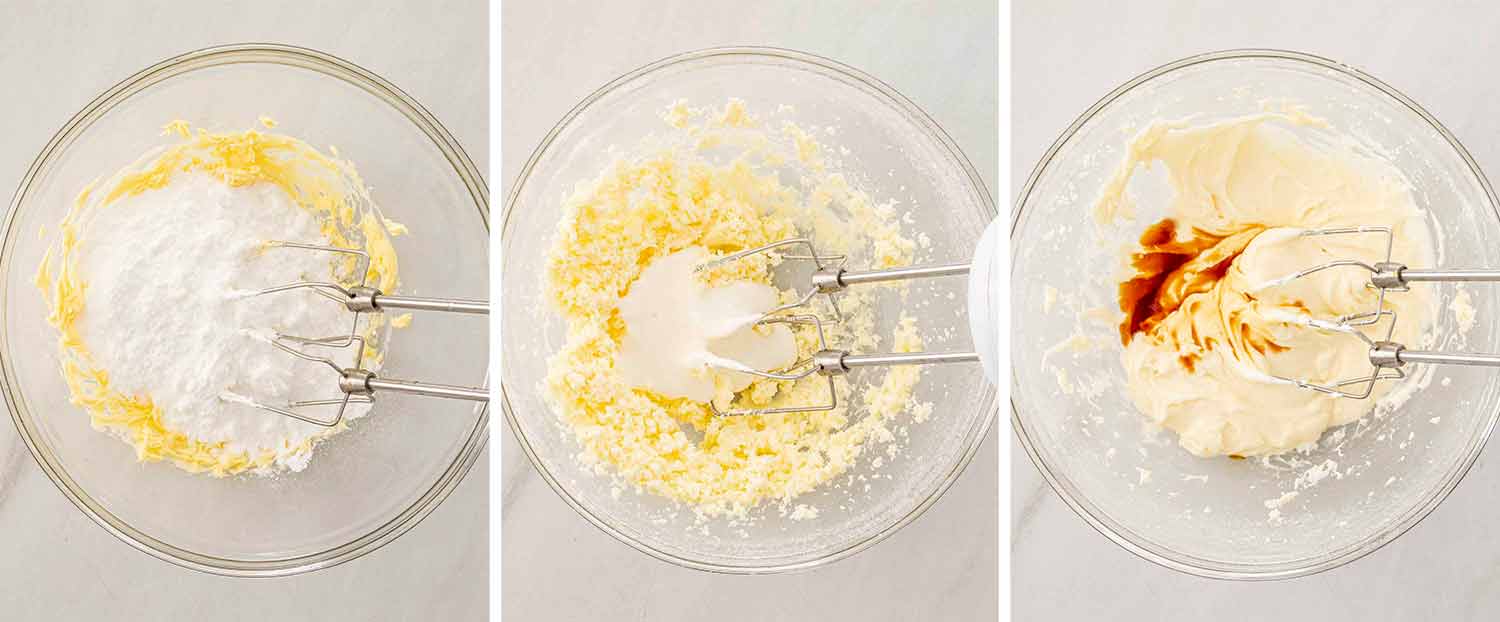
In a separate large mixing bowl, beat ¼ cup of softened unsalted butter until creamy. Add 1 cup of powdered sugar and beat until fluffy, about 2 minutes. Slowly add the cooled melted marshmallows and 1 teaspoon of vanilla extract, beating until well combined. If needed, add 2-3 tablespoons of heavy cream to reach a spreadable consistency.
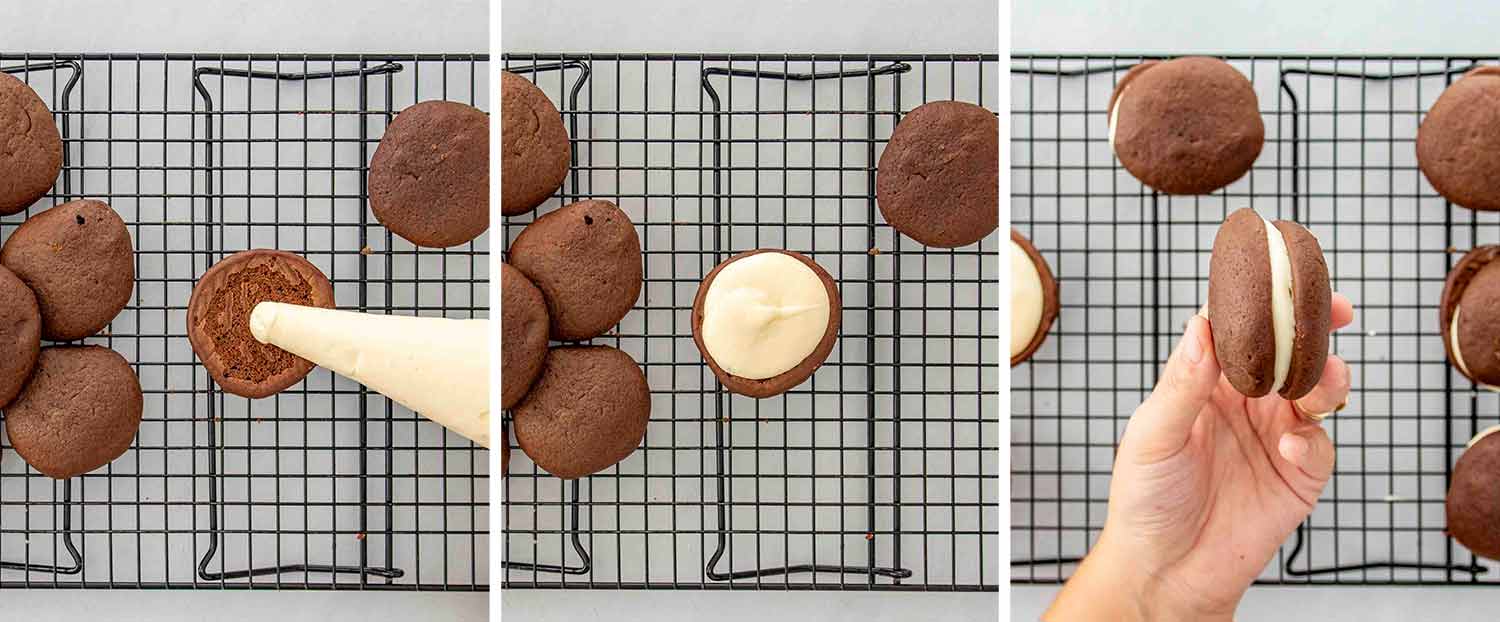
Spread or pipe a generous amount of marshmallow filling onto the flat side of half of the cakes. Top with the remaining cakes to create sandwiches.
Tip: Using a piping bag or zip-top bag with a corner snipped off can make filling the cakes neater and quicker.
Frequently Asked Questions
How do I store leftover Whoopie Pies?
Place any leftovers in an airtight container. They keep well at room temperature for up to two days. If you want them to last longer, store them in the refrigerator for up to a week. Just bring them back to room temperature before enjoying—they taste best when they’re not too cold.
Can I freeze Whoopie Pies?
Yes, you can freeze them! Wrap each assembled Whoopie Pie individually in plastic wrap to prevent freezer burn, then place them in a freezer-safe bag or container. They’ll keep for up to three months. When you’re ready to eat one (or a few!), let them thaw at room temperature for about an hour.
Can I use a different filling?
Definitely! If marshmallow isn’t your thing, you can fill them with vanilla buttercream, cream cheese frosting, or even peanut butter filling. Feel free to get creative and make them your own.
Why did my cakes turn out flat or spread too much?
This can happen if the batter is too warm or if the baking sheets are warm. Make sure your butter isn’t too soft, and try chilling the batter for 15-20 minutes before scooping. Also, let your baking sheets cool between batches or use separate sheets.
More Delicious Desserts
- Boston Cream Donuts
- Chocolate Pots de Crème
- Coconut Macaroons
- Slow Cooker Chocolate Candy
- Mississippi Mud Pie

Whoopie Pies
Equipment
Ingredients
For the Chocolate Cakes:
- 2 cups all-purpose flour
- ½ cup unsweetened cocoa powder
- 1 ¼ teaspoons baking soda
- ½ teaspoon baking powder
- ½ teaspoon salt
- 1 cup granulated sugar
- ½ cup unsalted butter softened
- 1 large egg
- 1 teaspoon vanilla extract
- 1 cup whole milk
- ½ cup hot water
For the Marshmallow Filling:
- 1 cup mini marshmallows or large marshmallows, chopped
- ¼ cup unsalted butter softened
- 1 cup powdered sugar
- 1 teaspoon vanilla extract
- 2-3 tablespoons heavy cream optional, for desired consistency
Instructions
- Preheat your oven to 350°F (175°C). Line two large baking sheets with parchment paper.
- In a medium bowl, whisk together the flour, cocoa powder, baking soda, baking powder, and salt. In a large mixing bowl, beat the softened butter and sugar together until light and fluffy, about 2 minutes. Add the egg and vanilla extract, and beat until combined.
- Add the dry ingredients to the butter mixture, alternating with the milk, beginning and ending with the dry ingredients. Mix just until combined. Stir in the hot water until the batter is smooth and slightly runny.
- Drop heaping tablespoons of batter onto the prepared baking sheets, spacing them about 2 inches apart. You should have about 24-28 individual cakes. Bake for 10-12 minutes, or until the cakes spring back when lightly touched.
- Let the cakes cool on the baking sheet for 5 minutes, then transfer them to wire racks to cool completely.
- In a heatproof bowl, melt the marshmallows and 1 tablespoon of water in the microwave in 15-second intervals, stirring between each, until fully melted and smooth. Let it cool slightly.
- In a separate large mixing bowl, beat the softened butter until creamy. Add the powdered sugar and beat until fluffy, about 2 minutes. Slowly add the cooled melted marshmallows and vanilla extract, beating until well combined. If needed, add 2-3 tablespoons of heavy cream to reach a spreadable consistency.
- Spread or pipe a generous amount of marshmallow filling onto the flat side of half of the cakes. Top with the remaining cakes to create a sandwich.
Tips & Notes:
- Consistent Sizes: Use a cookie scoop to ensure your cakes are all the same size, making it easier to match them up when assembling.
- Filling Variations: Feel free to get creative with the filling—try adding a spoonful of peanut butter, a sprinkle of cinnamon, or even a dash of espresso powder for a unique twist.
- Storage Tips: Store your Whoopie Pies in an airtight container at room temperature for up to two days, or refrigerate them to keep them fresh a bit longer.