This post may contain affiliate links. Please read my disclosure policy.

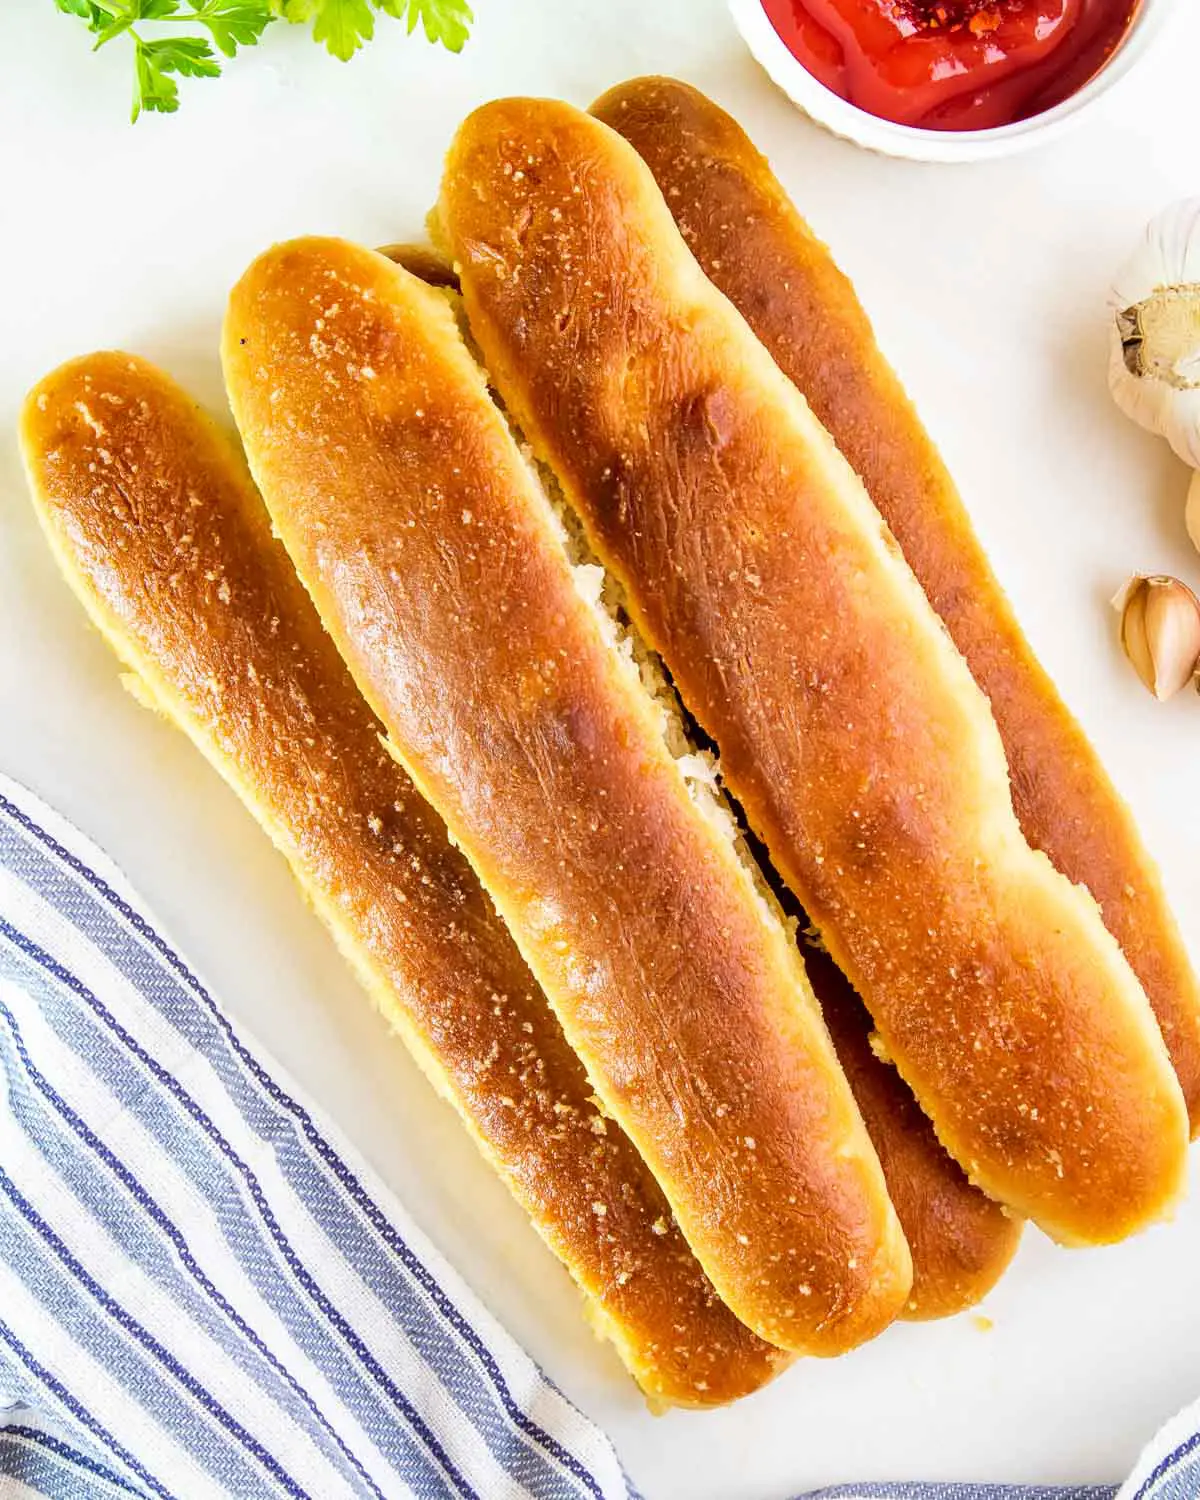
Quick and Easy homemade Breadsticks, made completely from scratch with a simple and delicious garlic butter topping. This is a simple recipe of the popular Olive Garden Breadsticks, perfect for serving alongside soups or salads. They’re soft and fluffy, totally delicious and addictive!
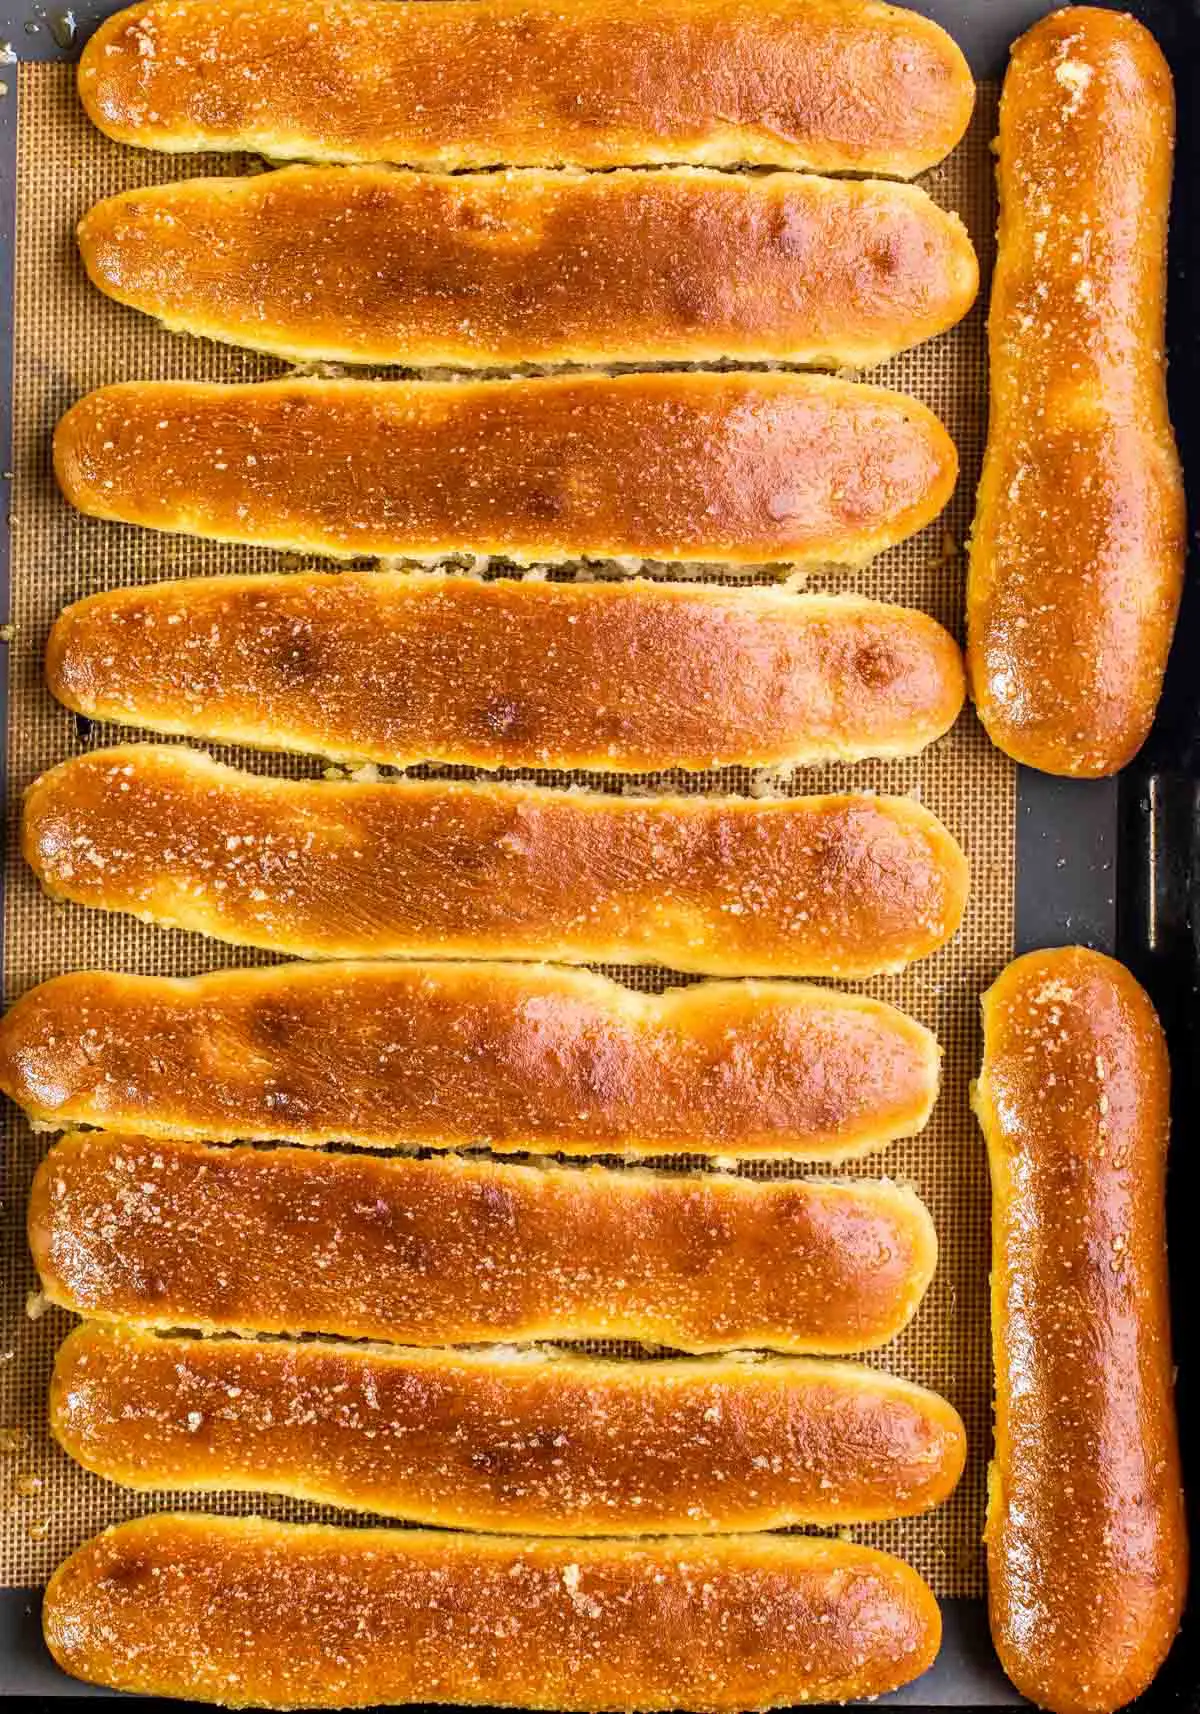
Breadsticks
This recipe is one of my favorites, not only because I love to bake but because I love to bake easy recipes. With this recipe, your breadsticks will always turn out amazing and delicious. They’re perfect served alongside your favorite soups or salads, or any other meals you like.
- Everyday Pantry Staple Ingredients
- Short Baking Time
- Guaranteed Family Favorite
With some of the most common pantry ingredients and just a few minutes baking time, I can assure you, this is by far the easiest and most fun way to make these seriously tasty breadsticks. You won’t need to crave those Olive Garden breadsticks anymore since this recipe will become your all time favorite!
Ingredient Notes
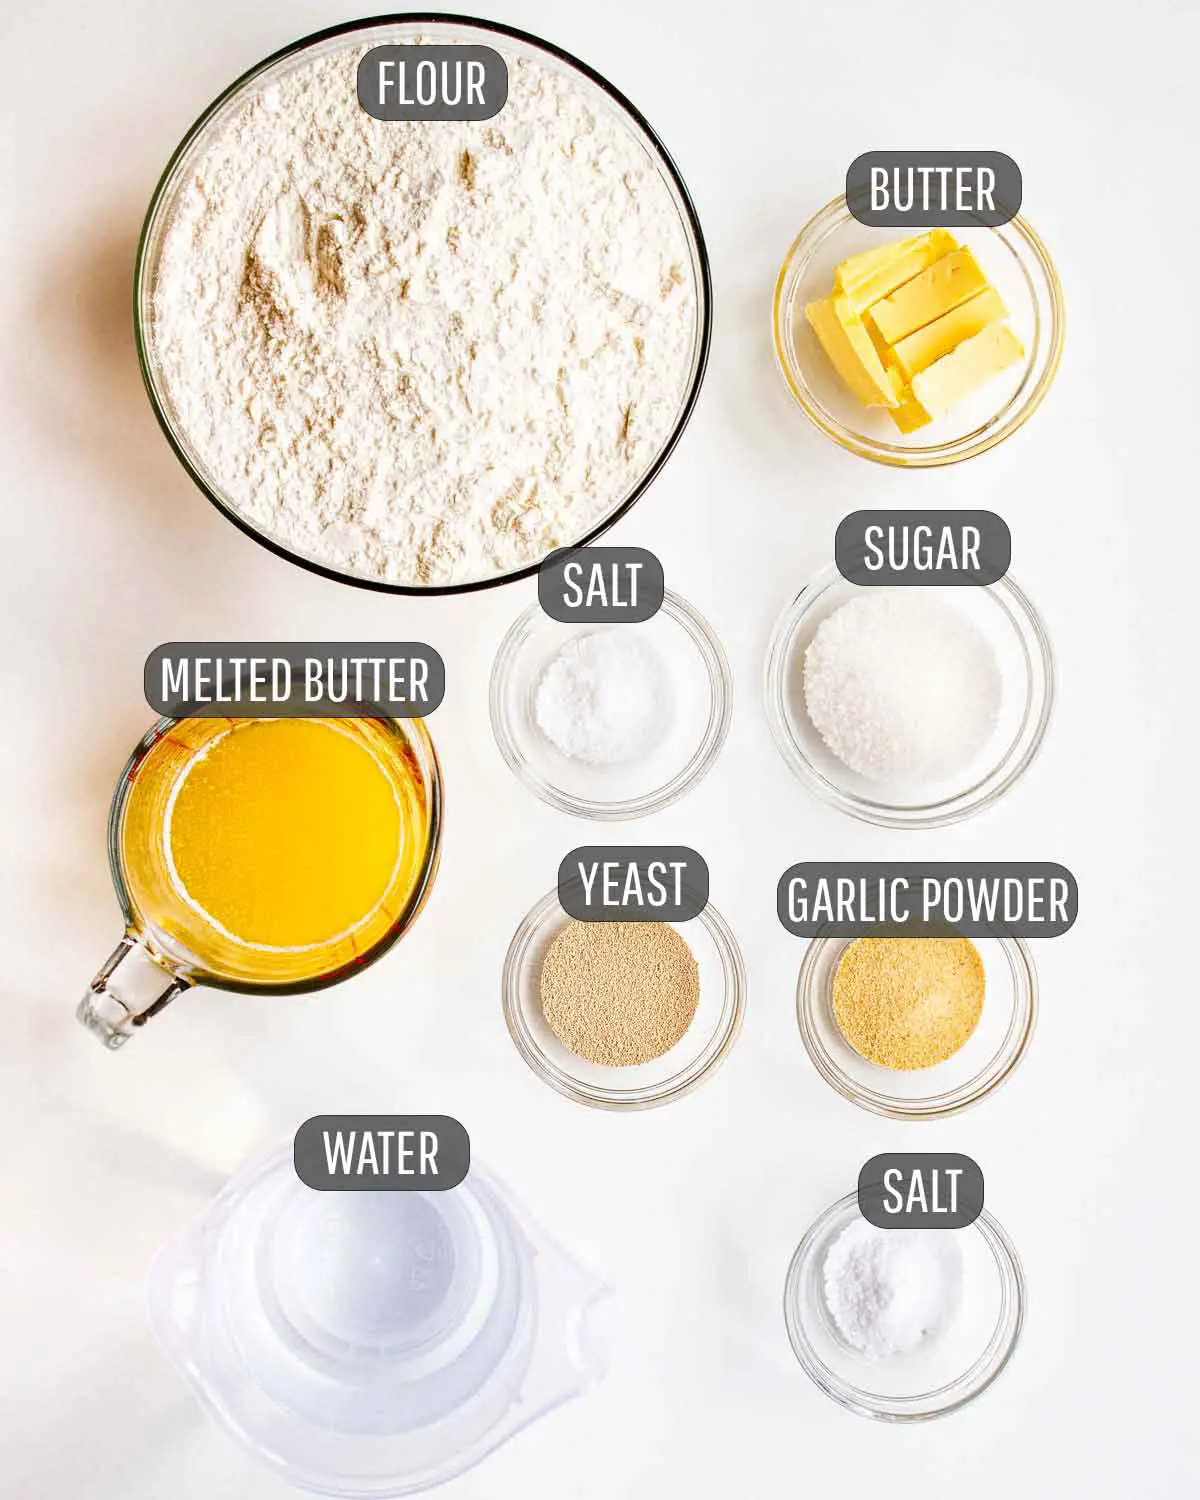
- Water – It’s super important to make sure your water is lukewarm. The best temperature of the water should be anywhere from 95 degrees to 105 degrees for this. You don’t really want anything warmer, as it will kill the yeast.
- Yeast – I used active dry yeast, which requires to be activated, but you can also use instant yeast which does not need to be activated.
- Butter – I always use unsalted butter, especially in breads or rolls, because we already add salt, so this way I can control how much salt is added to my bread. Did you know that small quantities of butter is added to breads because it results in a higher rise and a crisper crust!
- Flour – All-purpose flour is all you need.
- Sugar – Sugar is important when making bread or rolls, it’s what makes it soft and tender by absorbing some of the water and slowing down the formation of gluten strands. Sugar is what feeds the yeast.
- Topping – Melted butter with garlic powder and salt.
How To Make Breadsticks
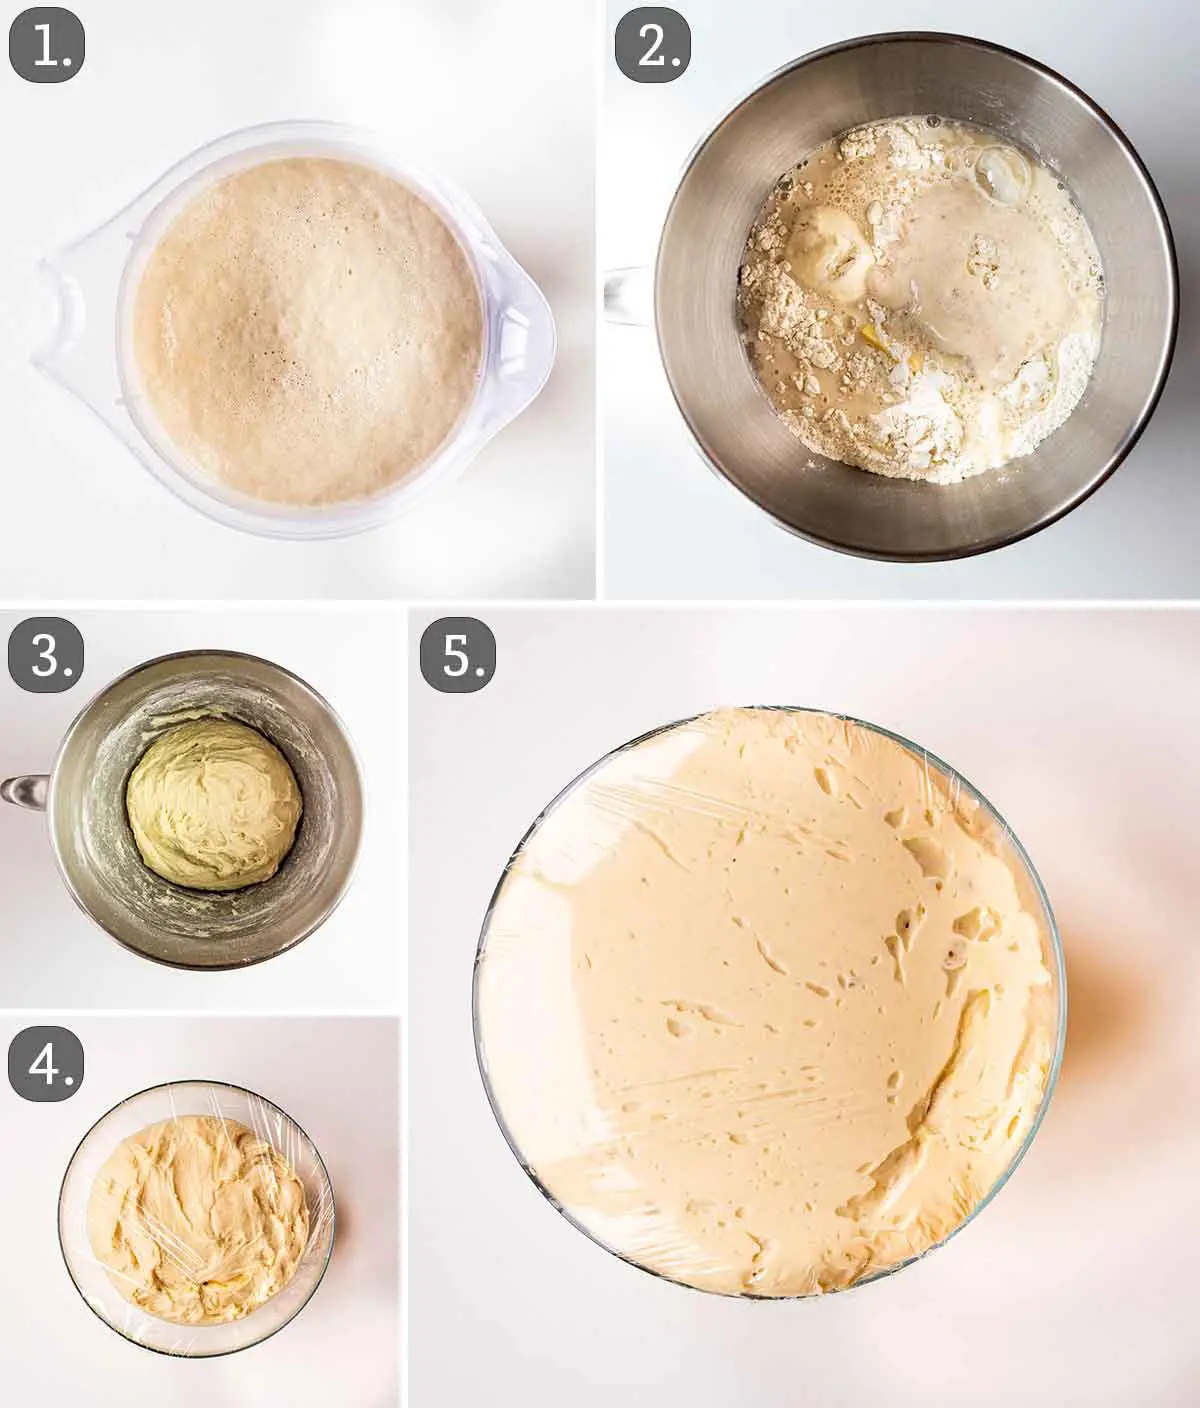
- Activate the yeast: In the bowl of your stand mixer combine the warm water with the active dry yeast and 2 tbsp of sugar. Stir and let it rest for about 10 minutes until the yeast start to foam up.
- Make the dough: Add the flour and salt over the yeast mixture. Using the dough hook, mix everything for about 5 to 7 minutes, until the dough is smooth, elastic and comes clean from the side of the bowl. If the dough is too wet add a bit more flour, a tbsp at a time, if too dry, add a bit more water.
- First rise: Transfer the dough to a large oiled bowl, cover with plastic wrap and let it rest in a warm, draft free environment for about 1½ hours, until doubled in size.
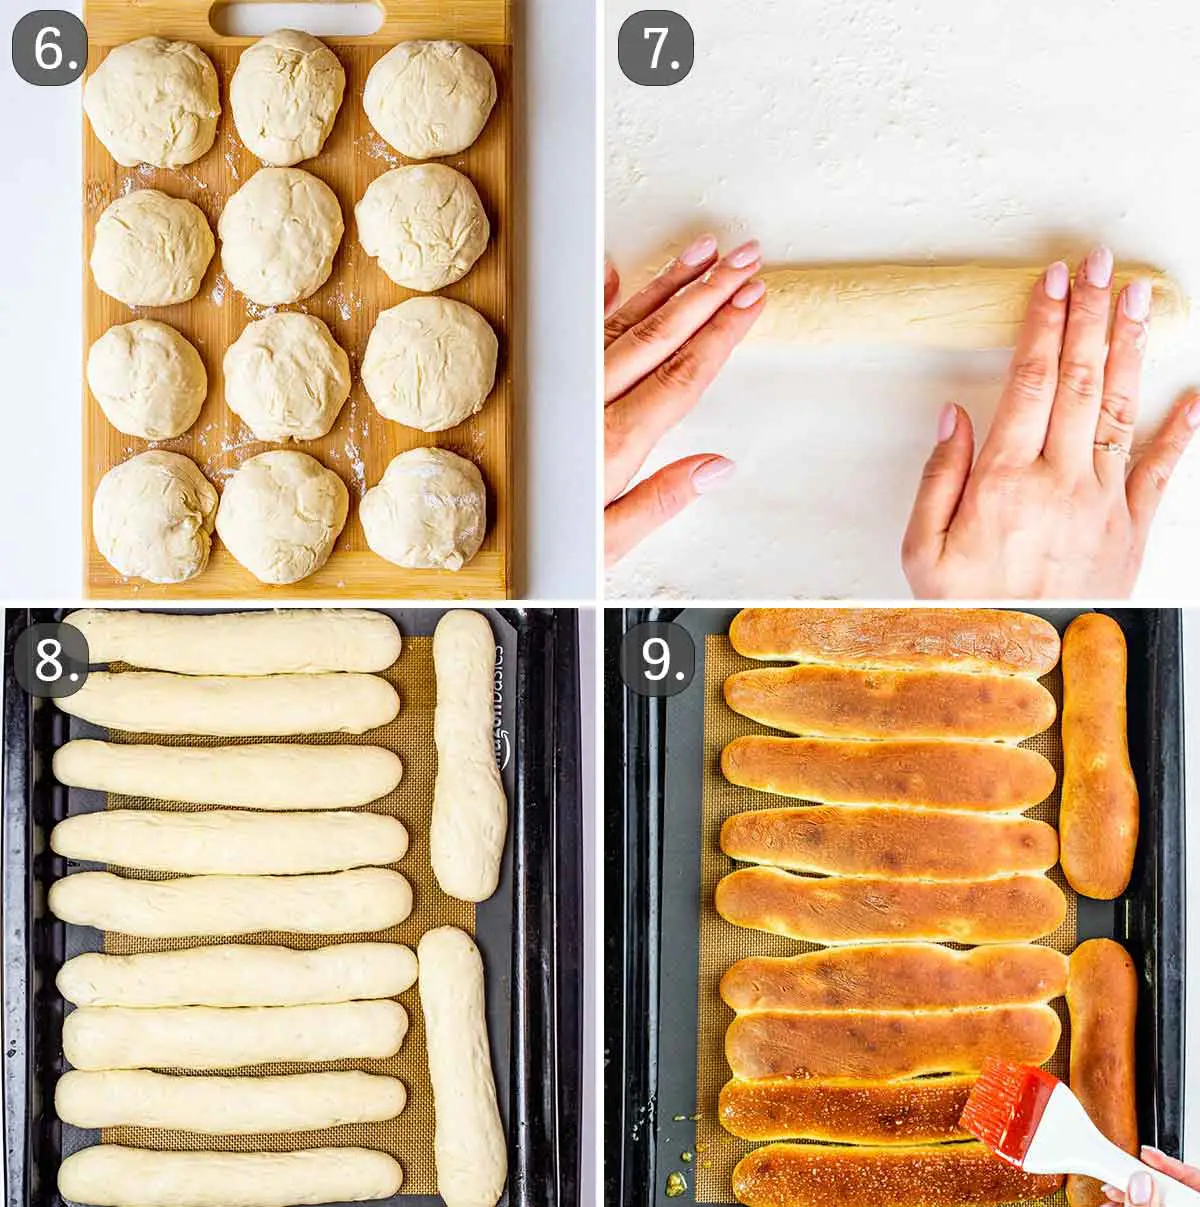
- Shape into breadsticks: Punch the risen dough to let the air out. Divide it into 12 equal pieces. Working with one piece at a time, keep the other pieces covered with a clean tea towel, roll each piece into a 9-inch rope, on a lightly floured surface. Transfer the breadsticks to two baking sheets lined with parchment paper, or one if the baking sheet is large enough.
- Second rise: Cover the breadsticks with a clean tea towel and let rise for another hour or until doubled in size.
- Prep the oven: Preheat the oven to 425°F.
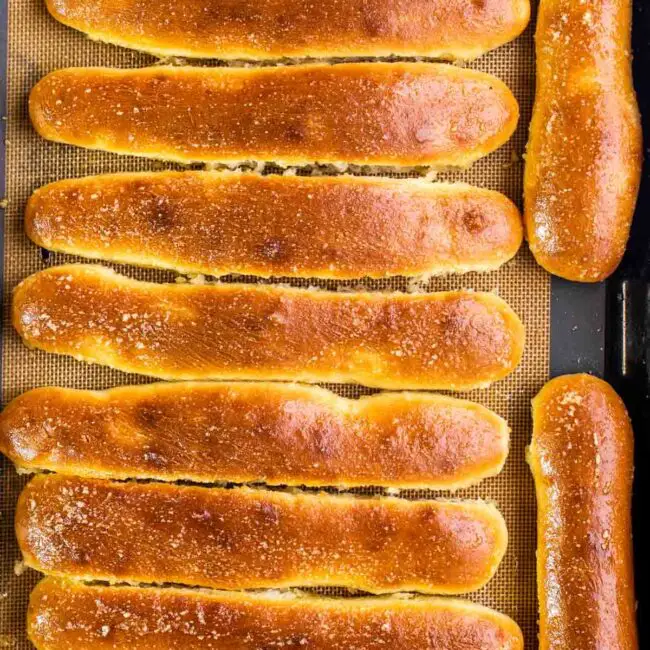
- Bake: Transfer the baking sheets to the oven and bake 11 to 13 minutes or until golden.
- Make the topping: In a small bowl whisk together the melted butter with the garlic powder and salt.
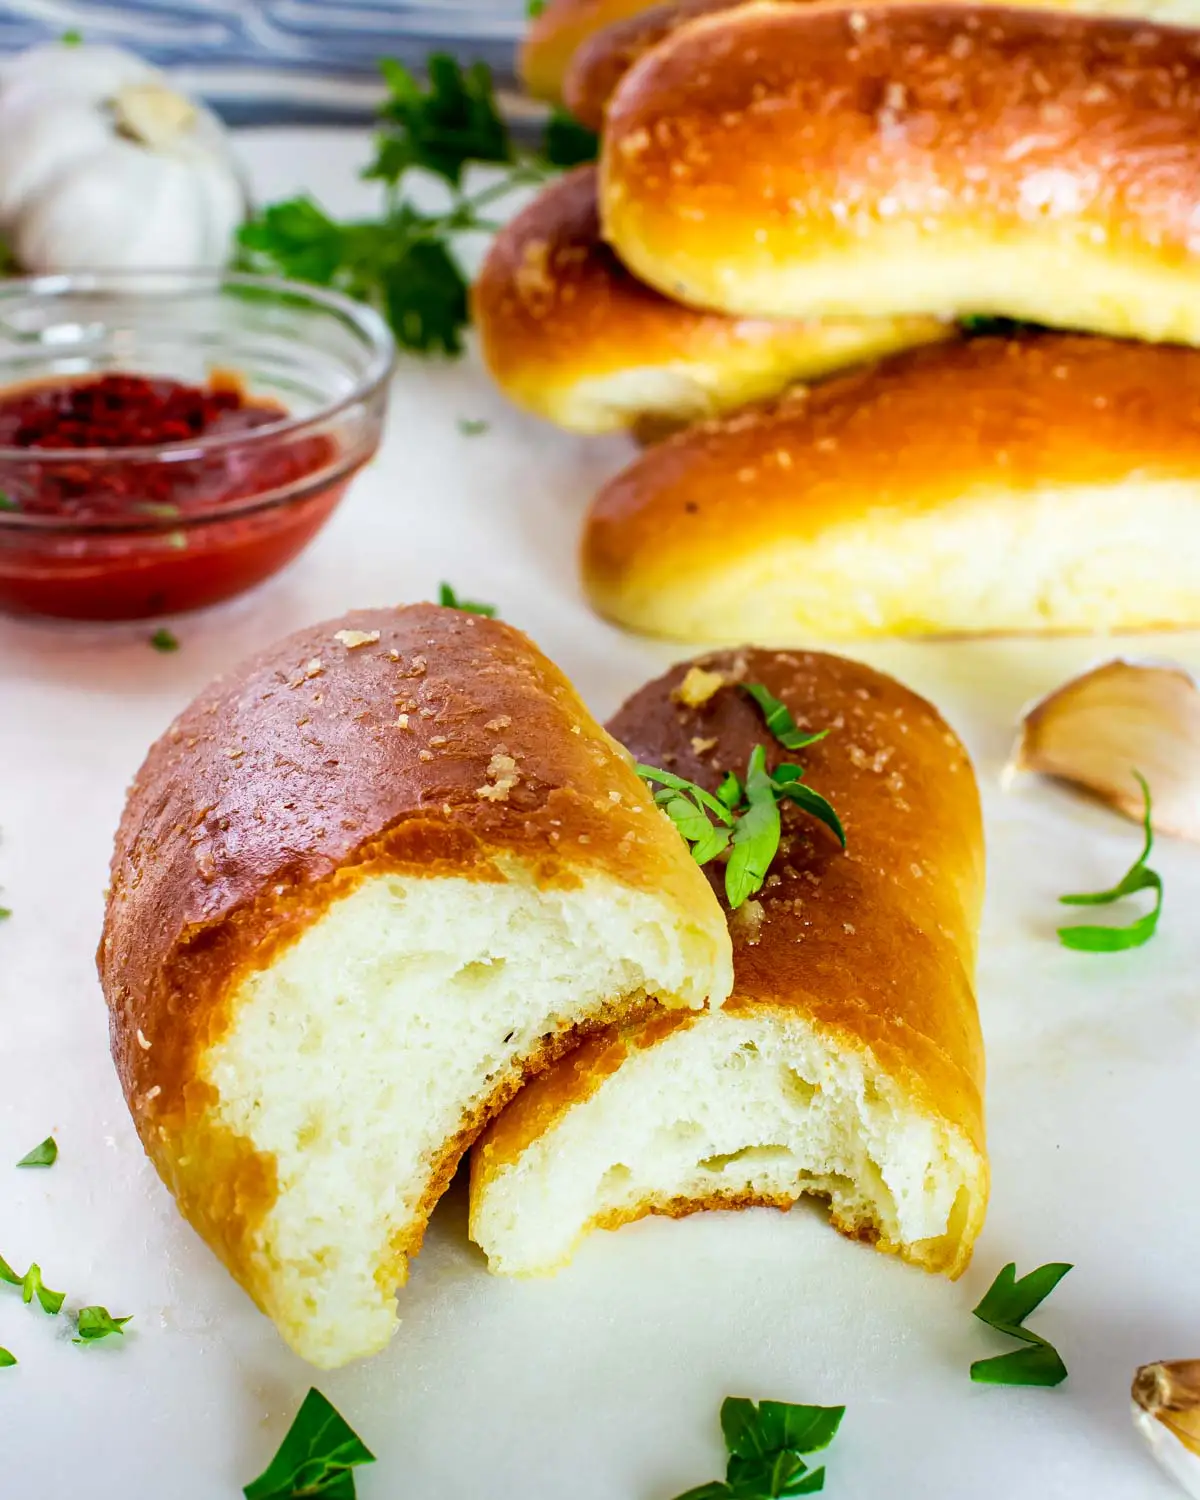
- Finish the rolls: Immediately after removing the breadsticks from the oven, brush them with the melted butter mixture generously. Serve warm.
FAQ’s and Expert Tips
FAQ’s
Frequently Asked Questions
How do you warm up breadsticks?
OVEN: Wrap breadsticks in foil and place them on a baking sheet. Bake at 350°F for about 10 to 15 minutes.
MICROWAVE: Wrap breadsticks in moistened paper towels and place on a microwave-safe plate. Warm on low power for 20-30 seconds.
What can I pair with breadsticks?
Breadsticks pair really well with meals such as soups, salads and pasta, making them the ideal appetizers! In fact, many dinner recipes suggest breadsticks instead of dinner rolls, especially for saucy meals.
How long do breadsticks last in the fridge?
Breadsticks should ideally not be refrigerated, as the bread will dry out and become stale faster than at room temperature. So if you want to have your breadsticks fresh for longer, make sure you freeze them when they’re fresh.
Can I make these breadsticks by hand?
Yes, of course. The dough is quite forgiving and you can mix your ingredients together by hand and knead it all on top of your counter.
Expert Tips
- Garlic is not the only seasoning you can use. Get creative and add any favorite herbs to your melted butter, such as rosemary, thyme, basil or even a nice Italian Herb mix.
- Make sure your ingredients are at room temperature, to ensure the development of proper structure in our dough.
- Dough thrives in a warm, draft-free environment. If your oven has a “proof” function, then use it. The “proof” function preheats the oven to 100°F, causing a warm, but not hot environment for your dough to rise nicely. If your oven doesn’t have this “proof” function, I would still use the oven. What I usually do is preheat the oven to 200°F, or whatever the lowest setting is for it. Once it reaches that temperature, turn off the oven, then place the dough in there to rise. This will speed up the proofing process tremendously.
Leftovers
Properly stored in a plastic storage bag or wrapped in foil, these breadsticks will last for about 4 to 5 days at normal room temperature.
Freezer
Once they’ve cooled to room temperature, place the breadsticks on a parchment paper lined baking sheet and cover with plastic wrap. Freeze for 1-2 hours until solid. Transfer them to a large freezer bag or airtight container. They will last up to 6 months in the freezer.
More Delicious Recipes To Try
Breadsticks Recipe
Ingredients
Breadsticks
- 1½ cups warm water around 100°F.
- 2¼ teaspoon active dry yeast (1 packet)
- 2 tablespoon sugar granulated
- 3½ cups all-purpose flour
- 2 tablespoon butter unsalted
- 2 teaspoon salt
Topping
- ½ cup butter melted
- 2 teaspoon garlic powder
- 1 teaspoon salt
Instructions
- Activate the yeast: In the bowl of your stand mixer combine the warm water with the active dry yeast and 2 tbsp of sugar. Stir and let it rest for about 10 minutes until the yeast start to foam up.
- Make the dough: Add the flour and salt over the yeast mixture. Using the dough hook, mix everything for about 5 to 7 minutes, until the dough is smooth, elastic and comes clean from the side of the bowl. If the dough is too wet add a bit more flour, a tbsp at a time, if too dry, add a bit more water.
- First rise: Transfer the dough to a large oiled bowl, cover with plastic wrap and let it rest in a warm, draft free environment for about 1½ hours, until doubled in size.
- Shape into breadsticks: Punch the risen dough to let the air out. Divide it into 12 equal pieces. Working with one piece at a time, keep the other pieces covered with a clean tea towel, roll each piece into a 9-inch rope, on a lightly floured surface. Transfer the breadsticks to two baking sheets lined with parchment paper, or one if the baking sheet is large enough.
- Second rise: Cover the baking sheets with breadsticks with a clean tea towel and let rise for another hour or until doubled in size.
- Prep the oven: Preheat the oven to 425°F.
- Bake: Transfer the baking sheets to the oven and bake 11 to 13 minutes or until golden.
- Make the topping: In a small bowl whisk together the melted butter with the garlic powder and salt.
- Finish the loaves: Immediately after removing the breadsticks from the oven, brush them with the melted butter mixture generously. Serve warm.
Tips & Notes:
- Garlic is not the only seasoning you can use. Get creative and add any favorite herbs to your melted butter, such as rosemary, thyme, basil or even a nice Italian Herb mix.
- Make sure your ingredients are at room temperature, to ensure the development of proper structure in our dough.
- Dough thrives in a warm, draft-free environment. If your oven has a “proof” function, then use it. The “proof” function preheats the oven to 100°F, causing a warm, but not hot environment for your dough to rise nicely. If your oven doesn’t have this “proof” function, I would still use the oven. What I usually do is preheat the oven to 200°F, or whatever the lowest setting is for it. Once it reaches that temperature, turn off the oven, then place the dough in there to rise. This will speed up the proofing process tremendously.
- Storage: Properly stored in a plastic storage bag or wrapped in foil, these breadsticks will last for about 4 to 5 days at normal room temperature.
- Freezing: Once they’ve cooled to room temperature, place the breadsticks on a parchment paper lined baking sheet and cover with plastic wrap. Freeze for 1-2 hours until solid. Transfer them to a large freezer bag or airtight container. They will last up to 6 months in the freezer.